Dimension Ribbon tab
Users may customize the Ribbon Interface by changing icon style and placement.
|
The Horizontal Distance option allows you to create horizontal dimensions between any two points.
Click for more Horizontal Distance info. |
|
The Vertical Distance option allows you to create a vertical dimension between two points.
Click for more Vertical Distance info. |
|
The Distance option allows you to measure the distance between any two points. The system prompts you for two successive measurement points.
Click for more Distance info.
|
|
The Angle to X Axis option allows you to determine the angle between two points along the horizontal plane.
Click for more Angle to X Axis info.
|
|
The Angle to Y Axis option allows you to determine the angle between two points along the vertical plane.
Click for more Angle to Y Axis info.
|
|
The Angle to 3 Points option allows you to dimension an angle along any three points.
Click for more Angle to 3 Points info.
|
|
A radius dimension allows you to display the radius for any arc or arc-shaped pattern.
Click for more Radius info.
|
|
A diameter dimension allows you to display the diameter for any arc or arc-shaped pattern.
Click for more Diameter info.
|
|
To erase a single dimension, select Delete Dimension from the Dimensioning menu.
Click for more Delete Dimension info. |
|
If you want to delete all the dimensions, select Delete All Dimensions from the Dimensioning menu.
Click for more Delete Dimension info.
|
|
The Redraw Dimensions option on the Dimensioning menu instructs the system to refresh the dimensions.
Click for more Redraw Dimensions info. |
|
The Label option allows you to attach a remark to any pattern point on the part or sheet.
Click for more Dimension Label info.
|
|
The Comment option allows you to attach a remark to a part or sheet.
Click for more Dimension Comment info.
|
|
If you want to automatically dimension the part using datum dimensions, use the Auto Dimensioning option on the Dimensioning menu.
Click for more Auto Dimensioning info.
|
|
The Check Dimensions option on the Dimensioning menu allows you to compare part dimensions against those on a blue print.
Click for more Check Dimensions info.
|
|
The Datum Origin option allows you to select one point on the part to use as the reference for all other datum dimensions.
Click for more Datum Origin info.
|
|
The Datum Horizontal option allows you to position a horizontal dimension for the X coordinate of a pattern.
Click for more Datum Horizontal info. |
|
The Datum Vertical option allows you to position a vertical dimension for the Y coordinate for a pattern.
Click for more Datum Vertical info. |
|
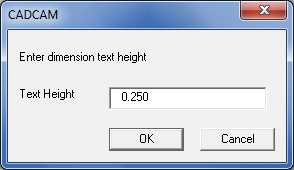
The Set Text Height option allows you to specify the text size for the dimensions that will display in the work area.
When the icon is selected, enter a value for the height in the Output pane at the bottom of the work area.
|
|
The Toggle Dimensions option provides a numbered key for a FabriVISION inspection report.
Click for more Toggle Dimensions info.
|
|
The Scale All Dimensions option allows you to enlarge or reduce all the dimensions on the part or sheet by specifying a ratio.
Click for more Scale All Dimensions info.
|
|
To insert data that will be displayed with the part click the Show Part Info icon to open the Part Info dialog.
In the dialog select data that will appear along the lower perimeter of the part by checking ON data fields. Choose an alignment option, click OK and the text will be placed automatically. Be sure to save the part to retain the text. See Show Part Info to learn more.
|
|
Settings |
To display tolerances with each dimension place a check mark in the Set Tolerance check box. Type the positive tolerance in the Tolerance (+) text box, and the negative tolerance in the Tolerance (-) text box.
You can then use the dimensioning options as needed. If the text height is adequate, the tolerances display to the right of each dimension as seen in this image -
|