Users may customize the Ribbon Interface by changing icon style and placement.
Tool Assign Ribbon tab
Users may customize the Ribbon Interface by changing icon style and placement.
|
|
|
|
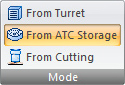
Select From Turret to assign tools installed in the turret.
When an ATC-compatible driver is loaded, select to assign tools From ATC Storage. If using a PDC-compatible driver, From PDC Storage will appear in this place.
Click for PDC/ATC info.
Select From Cutting to use cutting tools for combination machines.
Click for more Tool Selection Options info.
|
|
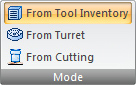
If a standard driver is in use (one that does not support auto-part removers or robots), this menu arrangement will appear. Select From Tool Inventory to assign tools that are listed in the Tool List. (From Turret and From Cutting are the same options as shown above.)
Click for more Tool Selection Options info.
|
|
|
|
The Assign option allows you to select the tool to use on a pattern.
Click for more Tool Assign info.
|
|
The Unassign options allow you to remove a single tool or multiple tools from patterns.
Click for more Tool Unassign / Box Unassign info.
|
|
Select to clear all assigned tools.
Click for more Clear Tools info. |
|
The Inquire option allows you to determine the tool assignment for a pattern.
Click for more Tool Inquire info.
|
|
Select this option to shift tooling to the other side of the line.
Click for more Change Line Side info.
|
|
This option allows you to change the direction of punching for lines, arcs and radiused slots.
Click for more Change Direction info. |
|
The Fence Auto Assign function allows the user to define any shaped closed-boundary area that will be the target for Auto Tool Assignment. Tool Assignment will draw tools from the Tool Inventory that is currently loaded, and the Fence Selection will occur as soon as the user left-clicks a final time to enclose the selection boundary.
See Tool>Manual Tool Assignment>Fence Auto Assign for more info.
|
|
Select this option to automatically assign tools to the part from the currently loaded tool inventory.
Click for more Automatic Tool Assignment info.
|
|
Select this option to automatically assign tools to the sheet from the currently loaded tool inventory.
Click for more Automatic Tool Assignment info.
|
|
The Tab option on the Tool menu allows you to add or modify tabs on lines, arcs or corner notches.
Click for more Tab info.
|
|
Select this option to enable semi-auto tooling.
Click for more Special Tool Assignments info.
|
|
The Tool Line Nibble option on the Tool menu allows you to manually apply a nibble tool along the part boundary.
Click for more Tool Line Nibble info.
|
|
The Stretch Tab option on the Tool menu allows you to modify tab sizes and tab angles on a pattern-by-pattern basis.
Click for more Stretch Tab info.
|
|
This option allows you to assign more than one tool to a single pattern.
Click for more Assigning Multiple Tools info.
|
|
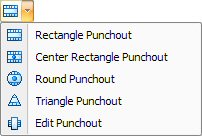
The Punch-Out options allow you to place common patterns on the part or sheet without adding geometry.
Click for more Punch-Outs info. |
|
It may be necessary after tooling the sheet to ensure that the tools do not travel outside of the table range.
Click for more Tool Checking Options info.
|
|
The View Tool Hits option on the Tool menu redraws the work area and displays all the tools assigned to the part or sheet patterns.
Click for more View Tool Hits info.
|
|
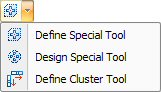
Click the drop-down arrow to define and design a special or cluster tool. A special tool is any tool configured of a non-standard shape.
Click for more Designing Special Tools info. |
|
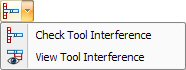
Click the drop-down arrow for tool interference options.
Click for more Tool Checking Options info. |
|
The Show All Instances of Tool option allows you to view the tool assignments in sequence.
Click for more Show All Instances of Tool info.
|
|
The Clear Tabs option on the Tool menu removes the tabs from all the patterns.
Click for more Clear Tabs info.
|
|
This option removes any tool hits that are completely covered by another tool hit assigned to a different pattern.
Click for more Remove Duplicate Hits info.
|
|
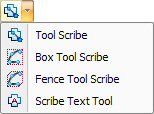
Click the drop-down arrow to select tool scribe options.
Click for more Tool Scribe info.
Click for specific info regarding Scribe Text Tool. |
|
The Tab Angle option on the Tool menu allows you to add or modify tabs on arcs.
Click for more Adjusting a Tab Angle info.
|
|
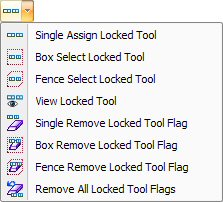
Click the drop-down arrow to select a locked tool option.
Click for more Locked Tool Flag info -
|
|
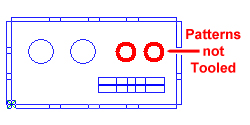
To view untooled patterns on a part, click the View Untooled Patterns icon. The pattern(s) that are untooled will be hi-lited in red.
When using a punching or combo machine, a pattern will remain untooled if a suitable tool could not be found for it when it was tooled in the Tool Assignment tab. Also try adjusting settings for Nibble Pitch and/or Die Clearance settings that may be blocking tool assignment for a pattern.
See Preferences>Tool Assignment and Tool Settings for more info on Nibble Pitch and Die Clearances. Nibble Pitch and Die Clearances can easily be toggled ON/OFF on the Toggle Toolbar in the lower right-hand corner of the AP100US program. |
|
|
|
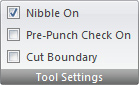
Place a check in the box to enable Nibble On, Pre-Punch Check On and/or Cut Boundary. The Cut Boundary option only displays for combo machines.
See Tool Settings for more info.
|
|
|