![]() The Material Library allows
the user to maintain and organize all materials and condition files that
are used by AP100US. In the Material Types panel the user may create and
maintain Material Groups that contain Material Types and have laser condition
(JK*...) files attached. In addition, create and maintain sheets in various
sizes with material types already attached in the Sheet Sizes panel.
The Material Library allows
the user to maintain and organize all materials and condition files that
are used by AP100US. In the Material Types panel the user may create and
maintain Material Groups that contain Material Types and have laser condition
(JK*...) files attached. In addition, create and maintain sheets in various
sizes with material types already attached in the Sheet Sizes panel.
Create New Material & Sheet Types
Material Types stored here are also available through the Sheet Wizard interface.
Click on the System Setting>Material>Material Library icon to open the Material Library main interface shown here.

1) Create New Material & Sheet Types
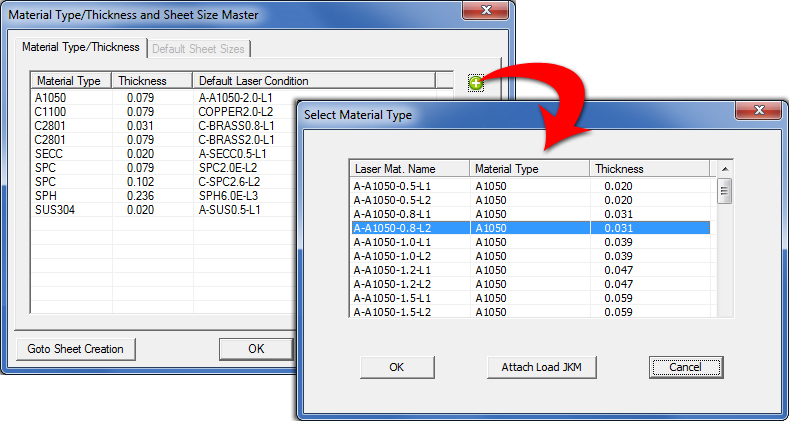
To use the Material Library, it's best to start by creating Material Types with Laser conditions (JK*...files from Amada Cut/Combo machines only) attached and Default Sheet Sizes. These will act as master files that can be used, edited and re-used as needed. To begin, click the Material Type/Thickness and Size Master button shown here -
![]()
The Material Type/Thickness tab lists material types with their thicknesses and default laser conditions that are available for use in the Material Library. Material Types shown in the tab are pulled from the currently loaded Material Inventory. Click the green Add button to open the Select Material Type window.
Laser Material Names listed
here are
pulled from the currently loaded JK*... file.
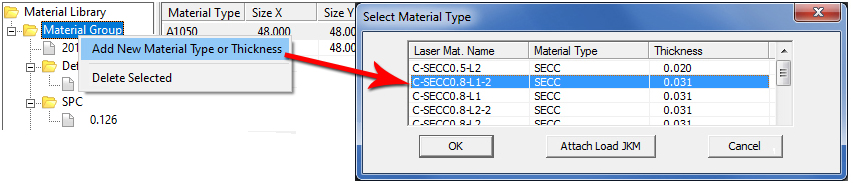
In the Select Material Type dialog, the user may select one or more Laser Material Names to be added to the Material Type/Thickness list, for use in the Material Library. Multi-selection is supported. When files are selected, click OK.
Note: Double-click any row in the Select Material Type window to open the Cutting Condition Table info panel with Read-Only info.
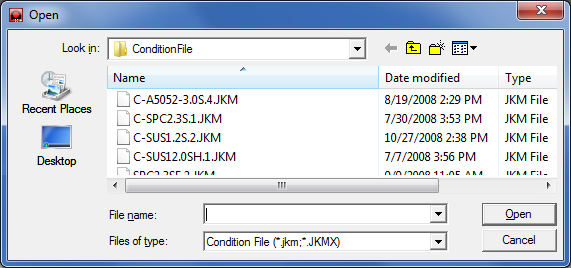
The user may also click the Attach Load JKM button, which will open the Open>Condition File folder. Select a JKM (single condition) file to be appended to the selected file(s).
A JKM Condition may also be attached to a selected file in the Material Type/Thickness tab.
Note: JK*... files are not available for non-Amada machine users; however the Material Library can still be used to maintain and organize materials.
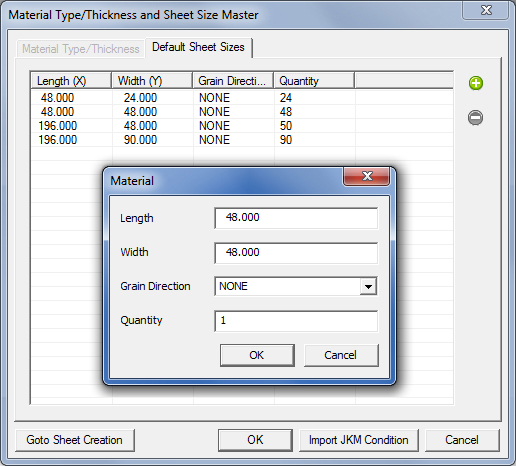
Creating Default Sheets
In the Default Sheet Sizes tab, click the green Add button to open the Material dialog. Enter values for a new sheet and click OK to add it to the list. These sheets will then be available for use in the Material Library. Click OK in the Material Type/Thickness and Sheet Size Master window to move ahead.
Click the Goto Sheet Creation button to open the Sheet Creation Wizard, covered in Step 3 below.
In the Material Library panel right-click on Material Library to show the flyout menu. Select Add New Material Group to open that dialog.
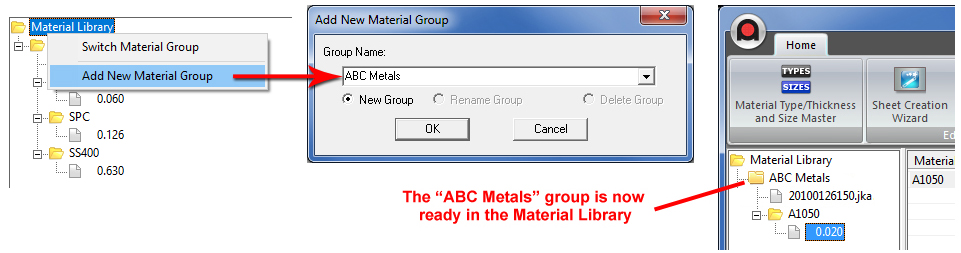
Enter a name for the New Material Group (such as "ABC Metals") and then click OK to create that group in the Material Library.
In this same dialog the user may also switch to another existing group by clicking Switch Material Group and then selecting another group from the pull-down.
Open the Sheet Creation Wizard by clicking the icon on the Ribbon menu.
![]()
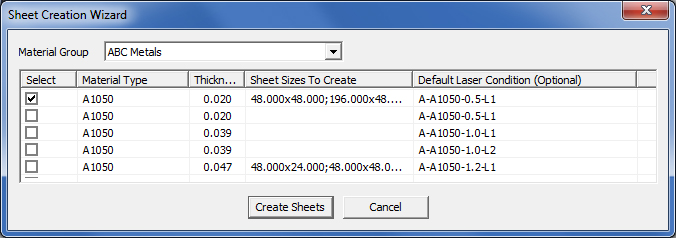
In the Sheet Creation Wizard select the Material Group Name from the pull-down. The new "ABC Metals" group has been selected here.
Check ON Create
these Sheet Sizes for ALL...
to assign these parameters to all material types
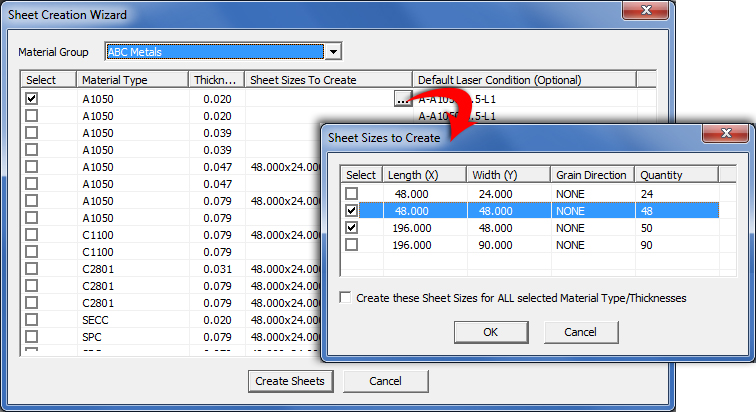
In the above image, the selected row (Material Type A1050) in the Sheet Creation Wizard has no sheets attached. Click the Sheet Sizes to Create cell to enable the clickable button. Click to open the Sheet Sizes to Create dialog. Place a check the Select column for the sheets in the second and third rows. (These sheets were created in step 1.) Click OK to attach these sheets to the selected Material Type.
The 48x48 and 196x48 Sheet sizes are now
attached to the A1050 Material Type
To finalize the Create Sheets process, click the Create Sheets button to allow the Wizard to create sheets using the selected Material Type with Sheet Sizes, Default Laser Condition and JK*... files already attached.
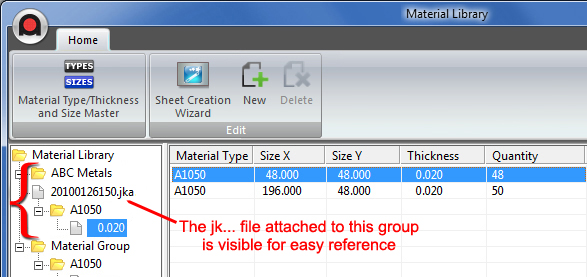
In the final result, the newly created ABC Metals group with Material Types attached is ready for use.
 At
this point the user can select any Material Type in the Material Type
List and then click the New button.
This will add an identical copy of the selected file to the list. The
copied file can then be edited as needed. (See Material
Type Editing Options below.) Click the Delete button to
delete any selected Material in the list.
At
this point the user can select any Material Type in the Material Type
List and then click the New button.
This will add an identical copy of the selected file to the list. The
copied file can then be edited as needed. (See Material
Type Editing Options below.) Click the Delete button to
delete any selected Material in the list.
Note: Before creating sheets and groups, JKM/JKMX Condition files should already have been copied into the C:\AP100US\ConditionFile folder. However, a condition file can be imported from any location on a local PC or network.
Click here for additional info on JK*... files and importing cutting tables into AP100US.
Edit Material Thickness
The Material Thickness can be edited in the Material Library file panel. Making a change here will update the material thickness of all files in the folder.

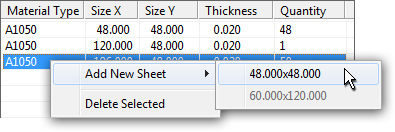
Adding / Editing Sheets flyout in the Material Type panel
Right-click anywhere in the Material Type panel to open the flyout menu. Select Add New Sheet (select size if available) to add a copy of the default sheet to the list. As with any sheet, a copied sheet may be edited as needed.
Add / Remove Column Headers in the Material Type panel
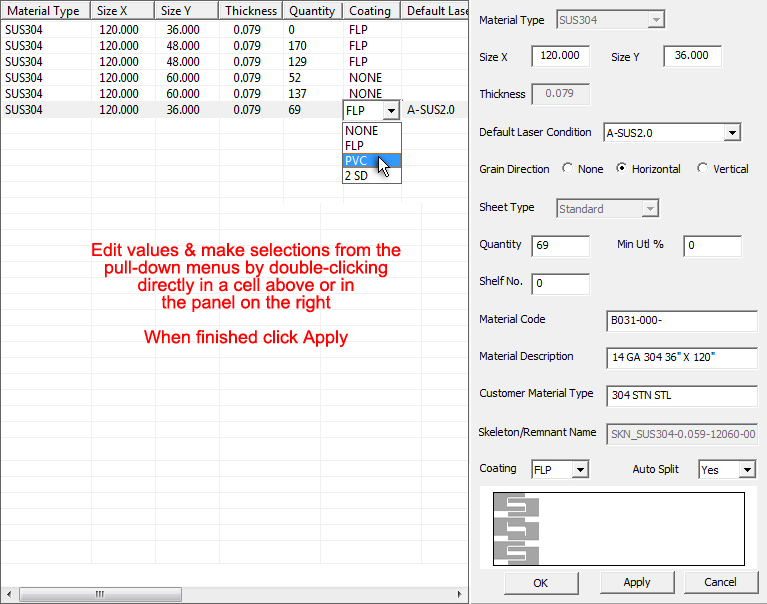
Right-click on a column header in the Material Type panel to open the flyout menu. Check ON or check OFF column headers as needed. Once a column is checked ON the panel will display the specified information. Most columns are read-only; however, the columns that may be edited by double-clicking in the cell and entering a value are: Quantity, Tower Quantity, Reserved, Material Code, Material Description, Shelf No. and Customer Material.
For Default Laser Condition, Grain Direction,Coating and Status columns, double-clicking in the cell enables the pull-down menu.

Add a New Material Type to a Material Group
Add a New Material Type to a material group by right-clicking the folder of an existing group and selecting Add New Material Type or Thickness. Select the new Laser Material Name and click OK. A Material Group can also be deleted.
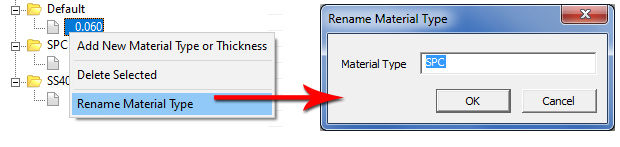
Rename
a Material Type
Click on a Material Thickness or the Material folder to open the Rename
Material Type flyout. Select the option and enter a new name into the
dialog. When OK is clicked, all the materials of this material type will
be renamed.
Material Types may be edited as needed. The Material Type, Thickness and Sheet Type columns are read-only.
Minimum Utilization
%
Min Util % controls nesting job output based on the percentage of the sheet
that is filled with parts. If this value is not met on one or more sheets
in the job, AP100US will not output those sheets in the nesting job.
If there are several sheets in a nesting job, the last sheet is often only partially filled with parts. In previous versions of AP100US the last sheet was still processed, meaning that material would be wasted.
60% entered into the value field means that if parts occupy 60% or more of the sheet it will be kept in the job. However, if less than 60% of the sheet is filled with parts, the sheet will be ignored by the system and renested later.
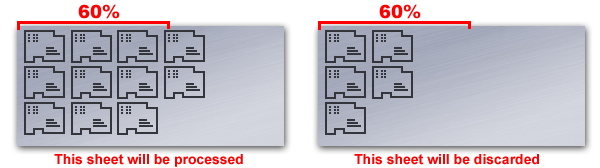
If the field is left empty or 0% is entered, then all sheets in a job will be processed even if one or more sheets are not filled with parts.
Material Code, Material Description and Customer Material Type
Descriptive information of the material. Material Code specifies the type,
thickness, and size of the material to nest a part on. This info must
be entered by the user, or these values may be predefined by the user's
ERP/MRP system.
Skeleton / Remnant
Sheet Name
A skeleton or remnant sheet is a partially used sheet, which has enough
unused material left that it may be recycled again in another nesting
project.
To designate a sheet as a skeleton or remnant sheet, the user must first enable the Skeleton option in the Machine & Turret>Sheet Info panel. After nesting a job in the Sheet Wizard, the program will automatically select and name a partially used sheet that may be reused as a skeleton as shown here -
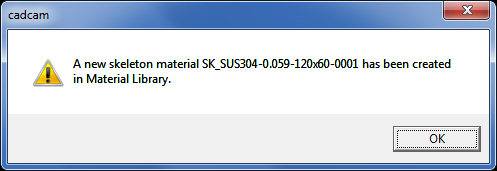
Note: The Remnant name may be customized. For more info see Sheet Wizard>Settings>Report Settings.
Click OK in the dialog to confirm and the new skeleton sheet will be made available in the Material Library interface as shown below -

The sheet thumbnail on the right shows the size
of the sheet and
the amount of the sheet that was already used in a nesting job
The name of the skeleton sheet is assigned by the system. SKN (skeleton) is followed by the material type, size of the sheet and unique version number (0001).
Accessible
through Sheet Wizard
The skeleton sheet can also be accessed through the Sheet
Wizard interface by clicking the Sheet
Size pull-down as shown here -

To force the skeleton sheet (or any sheet) to be used during nesting, in the Sheet Wizard check ON the sheet as shown in the image above, and in Sheet Wizard>Settings>Advanced Settings check ON the Only Nest with Selected Size check box.
A Skeleton sheet can also be applied to a current job through the Material Settings section of the Sheet Information window.
Coating
Select from NONE for uncoated material,
FLP (Fiber Laser Plate) for material
made for use with a fiber laser machine, PVC
protective surface coating or 2 SD
for two-sided PVC coating. If parts are added using the Add feature,
these fields will be marked NONE. This column is hidden by default;
right-click a column header to show the flyout menu to switch on the column.
Auto Split
To have the program automatically place splits on the sheet(s) in the Sheet Wizard, select Yes.
Parameters for the splits are pulled from the Split
Sheet Settings in the Material>Process Type Panel>Split Sheet
tab. To open the Material panel from the Sheet Wizard, use the Setting
Buttons at the bottom of the Settings window.
Sheet Thumbnail
Displays a thumbnail image of the currently selected sheet parameters.
If the sheet selected is a Skeleton sheet, the image will show sheet usage.
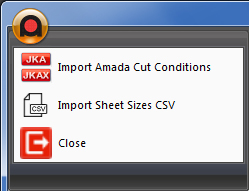
Importing Amada Cut Conditions file
Click the Import Amada Cut Conditions to open the Open>Condition File window shown here.
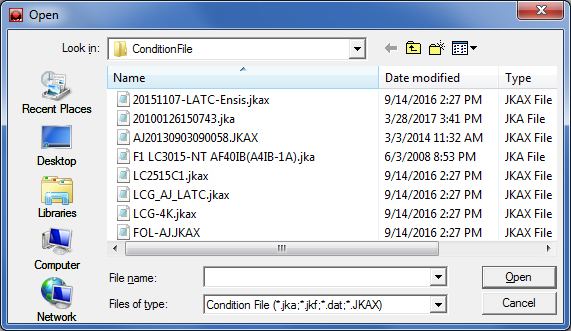
Insert the data from a jk*... file into the selected Material Type by hi-liting a jk*... file and then clicking Open.
See more info on Amada Cutting Condition files.
Importing Sheet Sizes CSV file
Click the Import Sheet Sizes Conditions to open the Open>CSV window shown here.
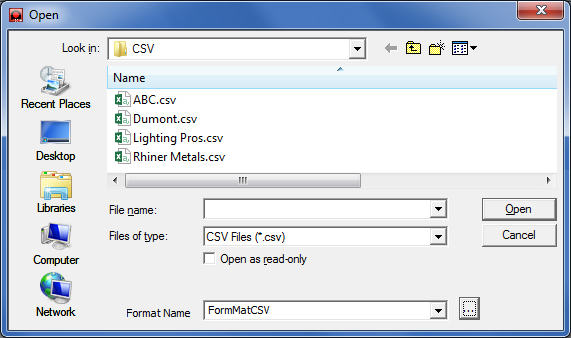
Insert the data from a CSV file into a selected Material by hi-liting a csv file and then clicking Open. To edit the csv file the user may click the Format Name pull-down to select another format, or click the Format Name button to edit the file itself (before clicking Open).
See Exporting Files in XLS or CSV formats for more info.