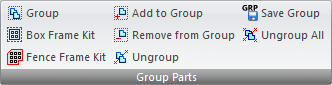
| Group Parts | Save Group | |
| Ungroup Parts | Box Frame Kit | Ungroup All |
| Fence Frame Kit |
Part Groups and Kits can be easily imported into the Sheet Wizard module.
Grouped parts can be Common Cut and saved with the sequence.
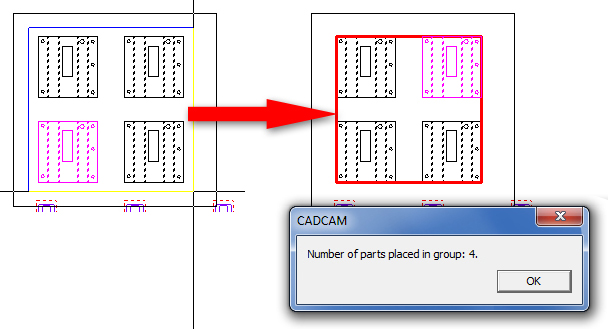
To define a series of parts as a group, click the Group Parts option on the Group Parts submenu. Drag out a simple box to enclose the parts to be defined as a group. To do so, left-click in the most convenient corner, drag out a square or rectangle to the opposite corner and left-click again to finalize the Box Group. At this point a dialog appears stating the number of parts placed in the group - click OK to acknowledge and the new grouping will be outlined in red as shown here -
Note: With the Group Parts option when the cursor is moved out of the work area or the operation is terminated, the red box will disappear; however, the parts specified are still enclosed in a group.
Notes:
Gridded parts cannot be grouped; if the user attempts to group gridded parts, the system will display a dialog asking for permission to "Convert Grid to Individual Parts." Click Yes to convert gridded parts to single part instances, or click No to cancel the grouping.
To group parts already gridded on a sheet, the user may also click the Grid option on the Sheet menu and in the Properties flyout that appears on the right side, select Convert Grid to Individual Parts. When this is done the Group Parts options will function normally.
Microjoints and tabs can be added at any time to parts in a group. For parts in a kit, see Box Frame Kit below.
The Move, Copy, Delete, Select, Auto Grid and Grid options function for part groups and kits the way they do for individual parts (Rotate is not available with this option). Click an option and then click anywhere in a part group or kit to select it.
Use same pattern to group rest of the parts in same grid
If all of the part are not grouped, then this save dialog will display. When the check box is checked ON, the system will use the same grouping parameters for all similar parts on a sheet.
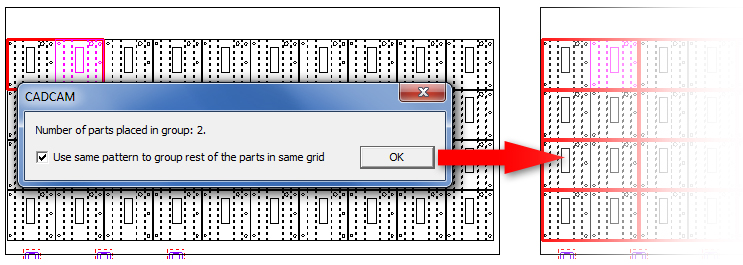
For example, in the above image only two parts have been grouped. and Use same pattern... has been enabled. When OK is clicked the system will place the remaining parts in groups of twos.
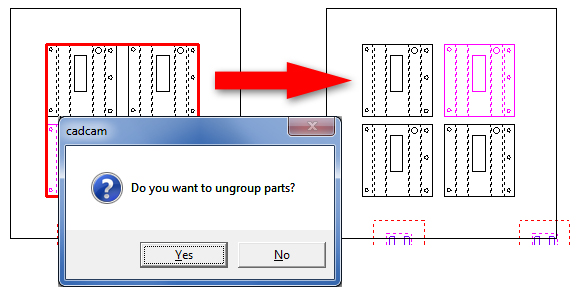
To ungroup all the parts in a group, click the Ungroup Parts button and click on any part within the group. Click Yes in the prompt to confirm the ungrouping. Other groups on the sheet will not be affected.
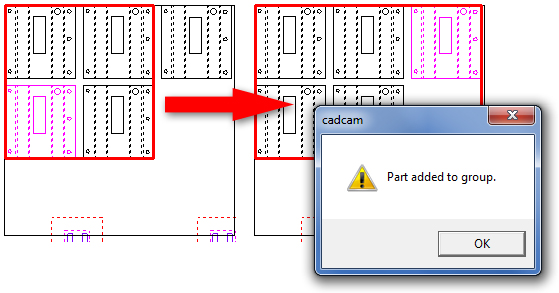
At any time the user may add a part to an existing group. Click the Add Part to Group button, left-click on any part in an existing group to select that group, and then left click the part to be added. The dialog will open with the "Part added to group" message - click OK to acknowledge. Parts must be added to groups one at a time.
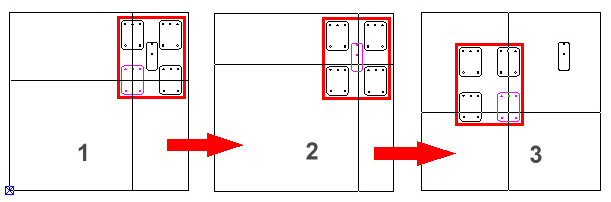
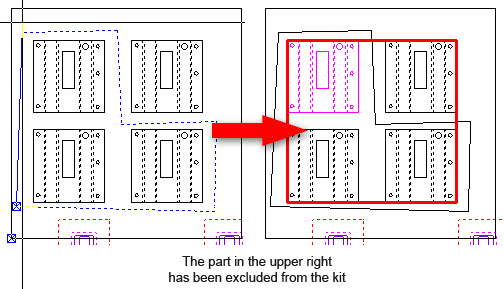
Remove a part from a group by clicking the Remove Part from Group button. Left-click on a part in an existing group to select that group (image 1), and then left click the part to be removed (image 2 shows that the center part has been selected). Image 3 shows that the part kit has been relocated using the Move tool. Notice that the part removed from the kit has remained in place. Parts must be removed from groups one at a time.
The kit shown here was created using the Box Frame Kit option
Note: Removing a part from a group resets any sequence assigned to the group.
Select this option to create a part kit. It is ideal for small parts that may accidentally get dropped between the slats on the cutting table or are too small for automatic part removers to handle. Box Frame Kit creates an outer boundary for the part kit that will be recognized by the system and cut out along with the parts in the kit themselves. A part kit with small parts (such as in the image below) may become unstable during cutting and removal; for this reason it is recommended to add microjoints or tabs to the parts in the kit even if they are not used on the overall sheet. Such microjoints will connect the parts to the skeleton that is within the kit boundaries.
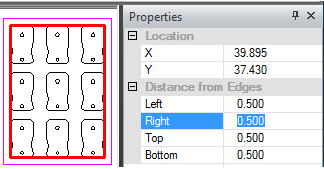
The pink outer line boundary for a Box Frame Kit constantly remains in view
When a box frame has been dragged out and finalized, enclosing the parts, the box frame Properties flyout appears (shown above). Left-click in any "values" field to highlight the value and manually enter a new value. Hit <Tab> to finalize the entry and jump to the next field.
Move the part kit box (including parts) to any part of the sheet by entering values in the Location fields.
The size of the box itself can be controlled by entering values in the Distance from Edges fields.
Note: Working with other options on the Sheet menu will close the box frame Properties flyout (if open) and open the Sheet Properties flyout.
Use this option to customize the kit boundary. Left-click to place the various points for the fence frame, right-click to join the lines and left-click again to finalize the boundaries of the fence frame kit. The original fence line remains with the kit.
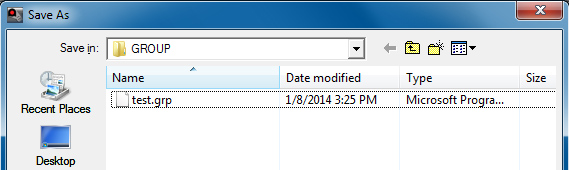
Saving Part Groups
If a group will be reused at a future time (for example a part kit created here can be imported into the Sheet Wizard, then save it to the AP100US installed folder (such as C:\AP100US\GROUP) as a .grp file.
This .grp file may be opened again and edited as often as needed. Such files can be placed on a new empty sheet, or on a sheet with other parts.
Note: If there are multiple groups on the sheet and Save Group is selected, the software will save the most recently created group on the sheet. For this reason, it is best to save groups or kits as they are created.
Saving a Sheet with Groups
A sheet with one or more groups can be saved, as the groups will remain intact when the sheet is opened again. However, in this case the part groups exist as a feature of the sheet, and not as independent parts groups.
This option ungroups all groups that have been created on the sheet. Click the button and respond Yes in the prompt to confirm the action.