![]() The
Move option allows you to relocate a part. When you load a part,
it is positioned at the default coordinates of 0X 0Y. You can easily move
the part to new coordinates.
The
Move option allows you to relocate a part. When you load a part,
it is positioned at the default coordinates of 0X 0Y. You can easily move
the part to new coordinates.
Notes: The Move option does not modify your parts. The tooling and sequencing remain intact.
Make sure you select the correct corner. The corner you select becomes the temporary reference point for the new position.
If you select the wrong corner, move the crosshair out of the work area. You can then move the crosshair back into the work area and click the desired corner.
If Show Actual Part Boundary is enabled, the system does not use a corner as an origin. Instead, the part moves using the point you chose when clicking to select the part as the origin for moving. The point hovers at the center of the crosshair.
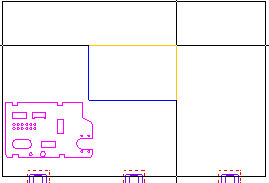
Moving a Part
When parts are loaded onto a sheet, they appear at the default coordinates of 0X 0Y. Select Move from the Sheet menu. Move the crosshair over the lower left corner of the part and click the left mouse button. Now move the part to the desired location.
To move multiple parts at a time, after clicking the Move button and, while holding down the <Shift> key, drag out a box around the parts to be moved. Finally, release <Shift>, click once to show the box, relocate as needed and left-click to place.
If you
click the lower left corner of the part, the outline
follows the crosshair using the corner as the origin.