If your machine driver supports punching conditions for tools, you can use the Punching Conditions dialog to assign those conditions that should be used with a selected tool. Click the Info button in the Station window to display the Station Tool Information window and click the Punching Conditions button. See also Punch Condition Options for more info on assigning punch conditions to tools through the Sequence Features menu tab.
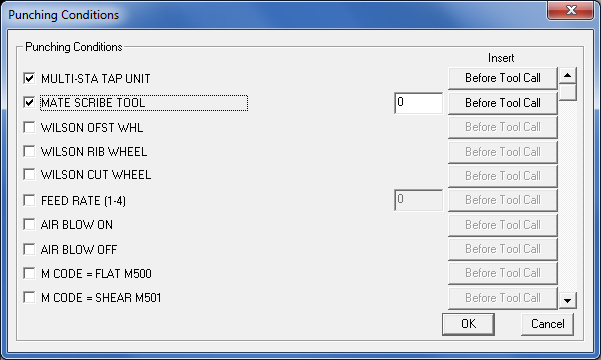
The Punching Conditions dialog will list the possible punching conditions and any settings pertaining to how the conditions are implemented. For each condition you select, you must also define a value (if required) and specify a setting for Insert definition. See Insert
Note: If more punching conditions exist, a scroll bar appears next to the buttons in the Insert column. Use the scroll bar to view the remaining punching conditions.
For info on Outputting a tapping tool to SDDJ when using the ATC Storage unit,
see Adding Tools to the PDC/ATC.
A list of possible punching conditions appears along the left side of the Punching Conditions dialog. To select an option, place a check mark in its check box. Use the buttons in the Insert column to define a condition value for the punching condition. See Insert.
A text box may follow the condition description. If a text box is present for a condition, type the value in the text box.
Insert determines when the condition should execute in the code. You will notice a series of buttons beneath the Insert label in the Punching Conditions dialog. Each punching condition has a corresponding Insert definition. Click the corresponding Insert button for the punching condition until the desired value appears.
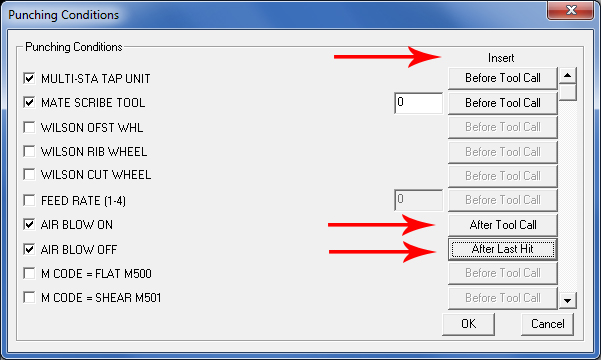
Before Tool
Call
Inserts the condition just before the tool call.
After Tool Call
Inserts the condition after the tool call.
After Last Hit
Inserts the condition after the last hit of that tool.