Adding Tools
to the PDC / ATC

|
Click the Add button
to add tools to the PDC. The PDC Storage window will update and
display the Tool List. To add a tool to the PDC, click and hold
the tool name in the Tool List on the right and drag it to an
empty station in the PDC Storage list.
|
|
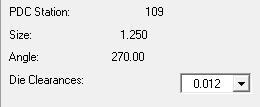
Use the scroll bar to locate
the desired tool in the Tool List window. When you select a tool
name, the die clearance information appears below the list. You
must select the correct clearance value below Die Clearances
before you can add the tool to the PDC station.
Notes:
Only the total number of die clearances display for the tool.
If the tool only has two die clearances, then only those two values
appear.
These instructions also apply
to the ATC Storage when an Amada Acies machine is in use. |
|
|
Output
a Tapping Tool to SDDJ
Note: This
option is specific to the ATC Storage unit.
A Tapping Tool
can be output to the SDDJ server. When a tapping tool is selected in the
Punching Conditions dialog (shown here outlined in red), it can be output
to the Process Information panel of the SDDJ server as outlined in red
in the next image.

Input values are from 1 to 7, which indicate
different tool types.

For
more info see Tapping Tool
Info.
This
option only takes effect for Round and Special tools, typically used for
tapping.
After
being saved to SDDJ, the tool will display in the Shape column on the
Used Tooling tab.
Note:
This only applies to ATC-type machines that are using the SDDJ server.
For
general Punch Condition rules and info, see Punching
Conditions Dialog and Punch
Condition Options.