When running a Combo machine it may be desirable to use a punching tool to punch out a pre-punch (or pierce) hole. Such a hole is punched out at a safe distance from any part geometry and allows a laser cut to begin without causing any damage to part perimeters.
Note: A pre-pierce can also be laser cut. When lasing, such a cut is called a lead-in. For more info see Lead In and Lead Out Panel.
Designating a Tool as a Pre-punch Tool
Pre-punch Hits Controlled in the Tool Sequence Priority List
Pre-punch Tool Hits in Subroutines
The Pre-punch Tool in the Reposition Command
Cutting Inside and Cutting Perimeter in the Tool Sequence Priority List
Designating a Tool as a Pre-Punch Tool
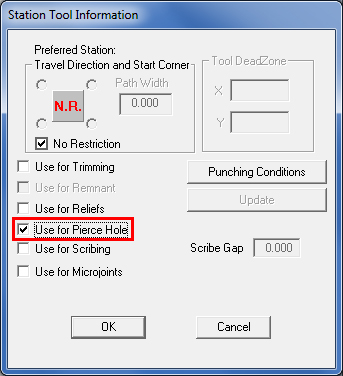
To utilize a tool as a Pre-Punch tool, the tool must be in a turret station and the Use for Pierce Hole checkbox in the Station Tool Information dialog needs to be checked ON. See Machine > Turret Setup > Station Tool Information window for more information.
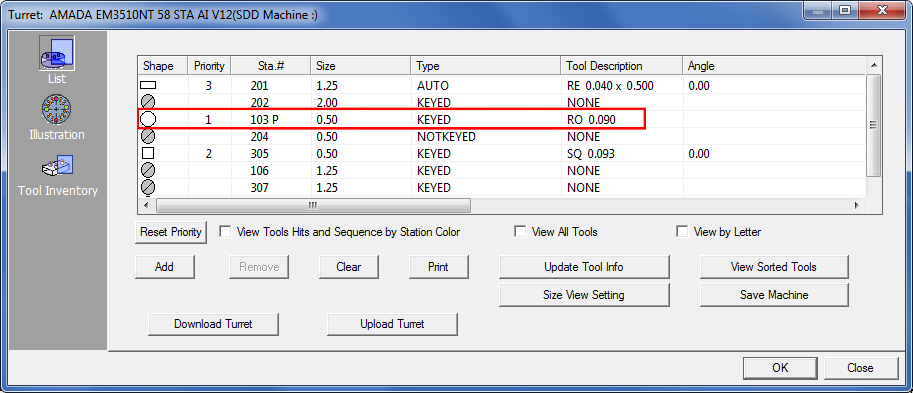
The tool will then display in the Turret Information window as shown below. Notice that in the Station # column, the tool is marked “P” for Pierce.
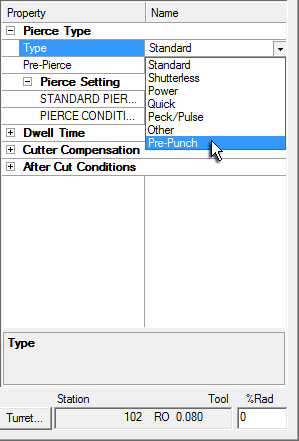
After the Pierce Hole has been set as shown above, the user will be able to set the Pierce Location>Pierce Type to Pre-Punch.
|
Then when the part or sheet is processed, the pre-punched holes will appear on the part or sheet as geometry. The tool that is set in the turret will determine the size of the pre-punched holes. The %Rad. Determines the distance away from the center point that the beam will start the lead in.
See Material File>Pierce Location Panel for more info. |
There are two preconditions for the pre-punch tool hits:
1. The part has its own start point;
2. If the part does not have start point, a default start point will be set in the material.
Pre-Punch Hits Controlled in the Tool Sequence Priority List
More options to control pre-punch tool hits are found in the Tool Sequence Priority list. See Sequence Features>Tool Sequence Priority window for more info.
Note: If the pre-punch tool is used on other features of the part, the pre-punching holes will be punched first. After that the sheet will return to its default start position before continuing with the rest of the hits for that tool.
The pre-punch tool can also be controlled from the Control One Tool Sequence Module but the pre-punch tool has to be selected from the drop-down list and cannot be selected from the screen. See Controlling the Pre-Punch in the Tool Only Sequence below.
A pre-punch tool can be sequenced inside subroutines or macros. The system will generate the macro code for pre-punch tool hits.
Note: Pre-punch tool hits have their own subroutine, which means this subroutine will contain one hit for the pre-punch tool.
The Pre-Punch Tool in the Reposition command
During repositioning, if the pre-punch hole is out of the tool’s range, the system will process the pre-punch hit(s) before cutting. When auto-repositioning, the system takes the pre-punch tools into account. Instead of the pre-punch being limited to the cutting range, it can go where it’s required, based on the tooling range.
To control a single tool sequence, from the drop-down arrow manually select the tool. The system will note in the Tool Only Sequence dialog that this tool is a Pre-Punch tool. See Control One Tool Sequence for more info.
Note: The Remove sequence option will not be available in this dialog, as it is not possible to remove the pre-punch sequence.

Cutting Inside and CUTTING PERIMETER in the Tool Sequence Priority List
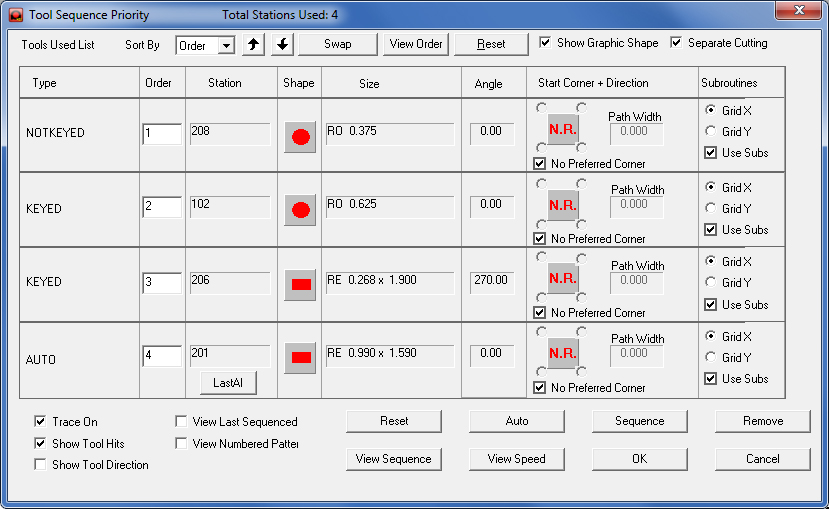
In a combination machine the pre-punch tool is in the sequence priority list.
With Separate Cutting disabled (as by default), cutting will be done part-by-part by the cutting tool in the Type column, Order #4 (inside cutting profiles and outside perimeters for each part are cut consecutively) as in the illustration.
Pre-punch tool hits are punched before the cutting sequence, so the priority of the pre-punch tools should be higher than that of cutting tools.
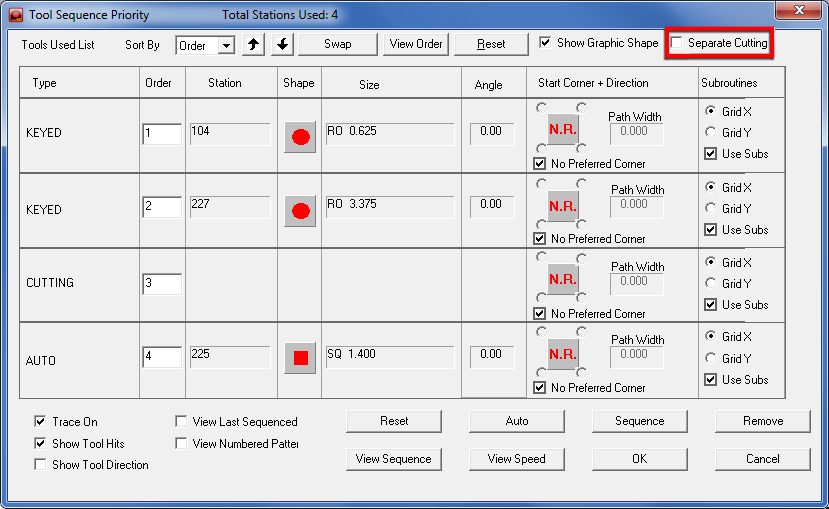
To have the Separate Cutting
checkbox
display, a combo machine must be loaded
When Separate Cutting is enabled, Order # 3 and 4 (in the illustration below) will be separated into Cutting Inside and Cutting Perimeter Types. This allows all the inside cutting profiles to be cut first separately and then the machine will go back and cut all of the outside perimeters to finish the job.
Note: The Separate Cutting option will not display if the part is not tooled for cutting. For punch machines the option will also not display.

Cutting Inside and
Cutting Perimeter now display
in the Type column when Separate Cutting is enabled