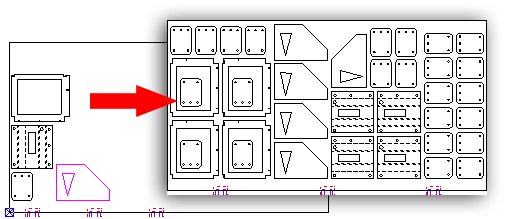
With the nesting options on the Sheet tab, users may nest a single sheet directly in the AP100US program. Based on the powerful Sheet Wizard nesting engine, this scaled-down option allows AP100US to make most of the nesting decisions.
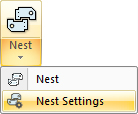
Click the Nest Settings option to edit nesting settings in the System Setting>Machine>Sheet Layout Info panel as needed. It may be necessary, for instance, to check ON the Nest Parts Inside Cutouts checkbox to allow small parts to nest in the cutouts of larger parts.
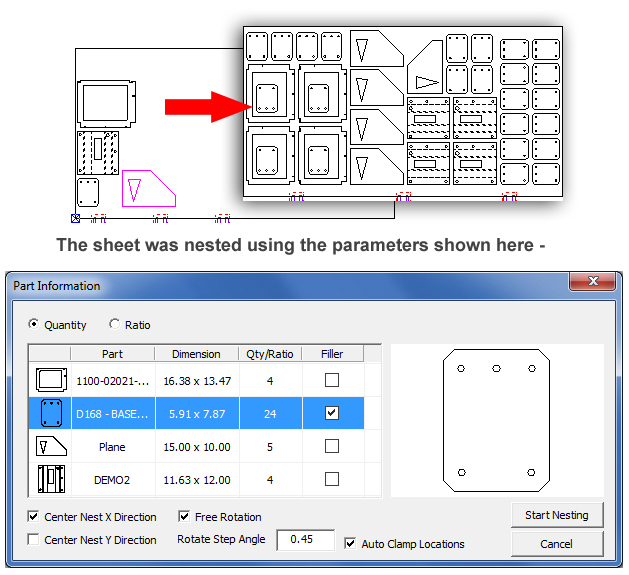
Click on Nest to open the Part Information window; this is where most of the work will be done.
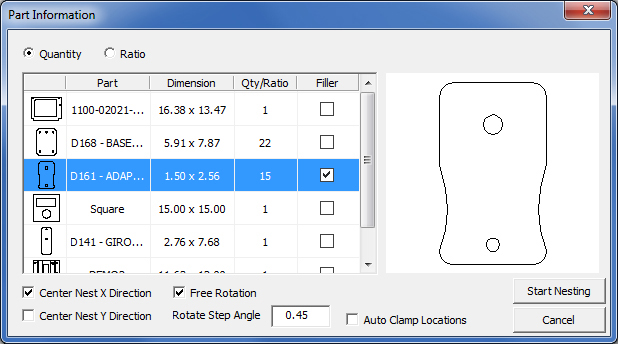
Select a part to hi-lite the row and show a thumbnail of the part
Quantity & Ratio
Select Quantity to manually enter values for the amount of parts to be nested for each part in the list. After Start Nesting has been clicked the system will nest each part using the Quantity amount entered. If the system detects that certain parts cannot be nested in the quantity entered (ex: sheet size may not permit such a quantity) the software will auto-update the Quantity value in the list to match what can actually be nested on the sheet.
When the user checks ON the Filler option for a part (only one part can be selected as a filler part), the system will allow that part, regardless of quantity entered, to fill open spaces on the sheet. If Nest Parts Inside Cutouts in the System Setting>Machine>Sheet Layout Info panel has been checked ON, then filler parts will also fill in cutouts in larger parts.
If Ratio is selected then the values in the Qty/Ratio field will be ratio values, allowing certain parts to be nested more than others. For example, a main part is used four times in an assembly while the remaining parts are each used only once. This gives a 4:1 ratio. The ratio value for the main part would be set to 4, while each of the other parts would be set to 1. When nested the main part would be nested 4 times more than the others. So, if the main part is nested 8 times, then each of the other parts will be nested 2 times.
If all of the values are set to 1 the system will nest the parts equally on the sheet. Each part in the list will be nested the same amount. Hit the Enter key to "lock" in a value that has been entered.
Note: Only the Qty./Ratio field is editable by the user.
Center Nest X Direction / Y Direction
These options will allow the user to center the entire nest of parts on the sheet, creating a symmetrical frame around the parts. If the Center Nest X Direction box is checked, the system will center the entire nest in the X direction, meaning that there will be an equal frame on the left and right sides of the sheet. If the Center Nest Y Direction box is checked, the system will center the entire nest in the Y direction. The frame on the top and bottom of the sheet will be the same size.
Free Rotation / Clamp Location
Check ON the Free Rotation checkbox to allow the parts to rotate freely during nesting. The Rotate Step Angle value is synchronized with the same value in Sheet Wizard>Settings, with values being entered into the C:\AP100US\Parm\NestWizard.ini file (RotateAngleStep).
Enter a value for the Rotate Step Angle. For example, if 30 is entered, then the part will rotate only to 30, 60, 90 degrees and so on.
Note: The lower the number the more often the program must calculate the angle, resulting in greater accuracy. If the number is higher it will be easier for the program to nest, but it can be less accurate.
Check ON the Auto Clamp Locations option to allow the program to relocate sheet clamps as needed. The range of clamp movement is controlled by Clamp Settings in the Machine>Description panel.
Start Nesting
When this button is selected, the Part Information window will close and the system will start the nesting algorithm for the sheet using the quantity/ratio values entered. Once nested the parts on the sheet may be deleted, moved, etc.
Note: This option works independently from the same option in Sheet Wizard>Settings>Sequence Settings,