![]()
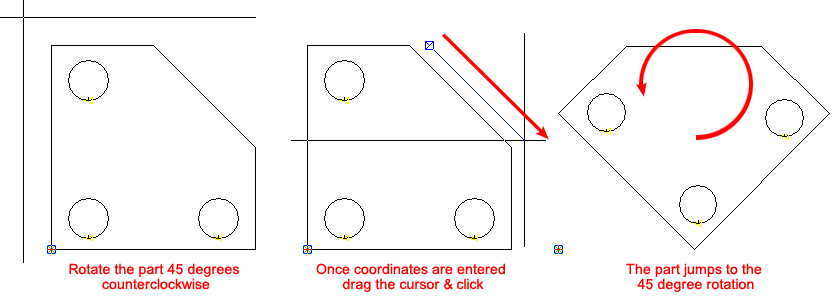
The Rotate Part option allows the user to rotate a part while it is being drawn in part view. It is useful when adding flanges at an angle or for modifying the orientation of a part to match a blueprint.
To rotate the part to a precise angle, use the Coordinates feature in the Draw menu.
For example, to rotate a 10 x 10 part to a - 45 degree angle, select Rotate Part from the Draw menu and move the crosshair cursor into the work area. When the Coordinates panel appears, type in <6X> to have the cursor begin the line at that point. then type in <10Y> for the Y-axis. For the angle type in <-45A> and then drag out the line in the correct direction. Left-click to finalize the rotation and the part jumps into place.
Notes: When a part is rotated the tool assignments that are no longer valid are removed, as is the associated sequence. Assign tools after rotation.
The user may also click to set X and Y values, however, using this method precise results cannot be obtained.
Click for info on Rotating Parts on a Sheet.