Punch Last
Hit in Punch Sequence
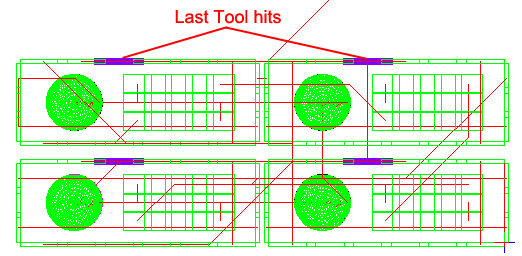
 This option allows the user
to select a part instance for sequencing the last tool hit within the
current sequence group. This feature, often used in conjunction with machines
(like the Amada Vipros) that use a work chute, pause to allow the
work chute to open to clear away slugs.
This option allows the user
to select a part instance for sequencing the last tool hit within the
current sequence group. This feature, often used in conjunction with machines
(like the Amada Vipros) that use a work chute, pause to allow the
work chute to open to clear away slugs.
.
Place Last Hit before Punch Last Hit
When the user clicks are
row of tooling to apply the last hit, if a tool has not already been placed,
the system prompts, “There is no assigned last tool hit on the part.”
In this case, go to the Sequence
Features tab>Punch Features sub-menu. Open the Place Last Hit pull-down
and select Place Last Hit. Typically,
such last hits are placed on an upper boundary row of tooling.
In the work area, the cursor
snaps to part boundaries. Select a part boundary, click the left mouse
button and a small circle marker appears along the path to indicate the
position of the last hit. Drag the circle marker to any position along
the length of the boundary and click to place.
To
choose a different pattern, click the right mouse button to cancel. Select
the correct pattern and click the left mouse button. When the position
of the circle marker appears correct, click the left mouse button. A last
hit marker appears at the selected point of the part boundary.
Back in Punch Sequence
Return to the Punch Sequence tab, select Punch Last Hit and place it on a
part tooling boundary with a Last Tool Hit..