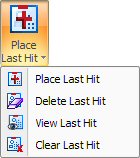
The Place Last Tool Hit, Delete Last Tool Hit, View Last Tool Hit and Clear Last Tool Hit options on the Last Tool Hit submenu allow the user to define and manage the placement of the final tool hit(s) on the part(s).
This option allows you to define which tool should be the last one hit in the sequence for the part. Select Sheet from the View menu to view the sheet, and then select Place Last Tool Hit from the Last Tool Hit submenu. The system prompts you to “Select a part boundary pattern or a single tool hit to place the final hit.” Move into the work area. The pointer bounces along the part boundary. Select the part boundary of your choice and click the left mouse button. A small circle marker appears along the path to indicate the position of the last hit.
Move the pointer to position the circle marker anywhere along the length of the boundary. If you want to choose a different pattern, click the right mouse button to cancel. Select the correct pattern and click the left mouse button. When the position of the circle marker appears correct, click the left mouse button. A last hit marker appears at the selected point of the part boundary.
To remove the last tool hit you defined using Place Last Tool Hit, select Delete Last Tool Hit from the Last Tool Hit submenu. Move into the work area and click the last tool hit you want to delete.
To see any last tool hits marked on the parts or a sheet, select View from the Last Tool Hit submenu.
To delete all last tool hits defined on the sheet, select Clear from the Last Tool Hit submenu.