
The Area Sequence button gives the user more control over the sequence; it allows the user to add a sequence to an area in any given order.
After a sheet has been tooled, click the icon and then drag out a rectangle of any size on the sheet; after the final left-click, all the patterns inside the rectangle will be sequenced.
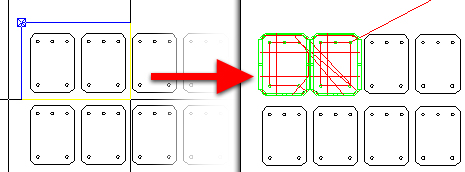
Area Sequence is very precise
- only the patterns that were
included in the rectangle will be sequenced
Note: If the rectangle width is less then the height, then the system will use X path width sequence. If the rectangle width is greater than the height, then the Y path width is used. If selecting the first rectangle point, click S on the keyboard, select the second rectangle point and it will use the shortest path to sequence the area (the sequence will start from the corner first selected).
The following rules apply -
1) For a combo machine, the Area Sequence in the Punch Sequence tab will area sequence both cutting and punching tools. In the Cutting Sequence tab only cutting tools will be area sequenced.
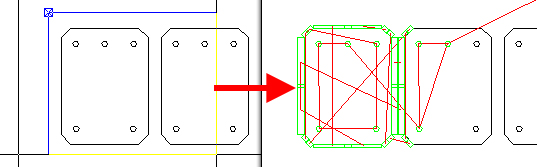
2) A cutting path must be fully inside of the selected area for the area sequence to be successfully added. Complete punching patterns must be fully inside of the selected area for the area sequence to be added successfully.
3) If the part boundary is in the selected area, the boundary will be sequenced last. This means putting the boundary as the last cut/punch.
4) When using “Area sequence“ in punch and combo (punch and cutting tools) machines, take into consideration the tool sequence controlled by the Sequence Priority list in Preferences>Tooling Options.
Manual changes can be made in the Sequence Features>Tool Sequence Priority window.