Pallets Menu
Using
a pallet in the Stacker work area allows you to more easily visualize
the final placement of parts on the stacking table. To create pallet layouts
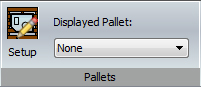
that will display on the stacking table under the unloaded parts, click
the Setup icon
to open the Pallet Setup dialog. Create
and use pallets that reflect the dimensions and types in your shop. Pallets
and Pallet Layouts that are assigned to a stacking job, will also appear
on the stacking tables in the CADCAM work area.
Notes:
When parts are unloaded to the stacking table, their stacking order will
not automatically be conformed to the dimensions of a pallet, as they
are unloaded according to Storage table size.
It's
advisable to create pallets that take into account the size of the sheets
that are used in AP100US, which reflect the size of sheet metal used in
your shop.
Pallets
are used in conjunction with Stack Table
layouts, which are usually created after Pallet Layouts have been
created.
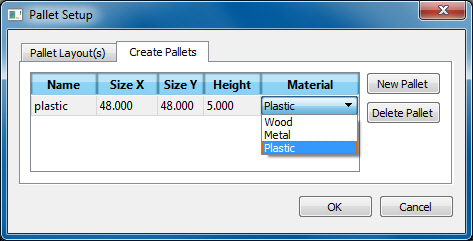
Create
a Pallet
1)
In the
Create
Pallets tab,
click the New Pallet button, which immediately enters an unconfigured
pallet in a row as shown here. Enter
a Name,
Size
and
Height
by clicking
directly in a column cell and typing in the info. In the Material
drop-down,
select one of the three options. In this example, Plastic
has been
selected.
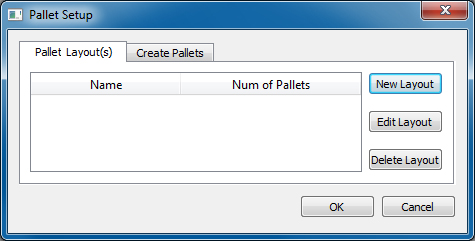
Create
a Pallet Layout
2)
Now a pallet
layout that can be used in the program must be created.
Click
on the Pallet
Layout(s) tab
and the program will ask you to save the newly created pallet. Click
Yes.
In
the Pallet Layout(s) tab, click
on the New Layout button.
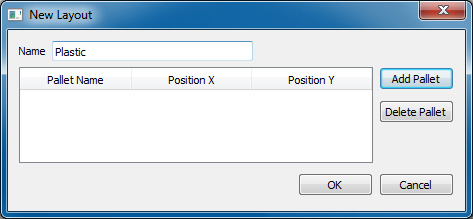
3)
In the
New
Layout dialog,
enter a descriptive name for the layout in the Name
field such
as "Plastic" (the name entered here will display in the Stacking
Module interface), and then click the Add
Pallet button
to attach the pallet created in step 1 to this layout.
4)
The Add
Pallet dialog lists all of the pallets
that have been created. The user may have more than one pallet in a layout,
but at least one pallet must be selected in the Number of Pallets drop-down
for the pallet to function in a pallet layout. To change this number later
the user must return to this dialog.
Click
OK
when finished
to return to the New Layout
dialog
-
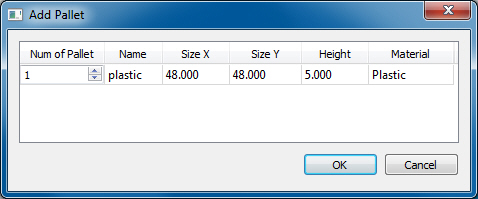
Most
fields in Add Pallet are read-only
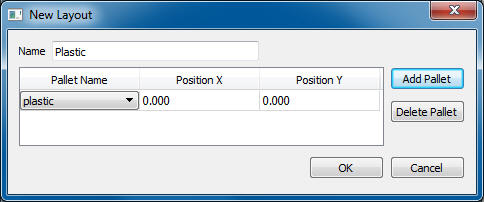
5)
Now that
the new "Plastic" pallet layout has been created, it may be
configured. Offset Positions
X and
Y
are calculated
from the lower left corner of the sheet/stacking table and may later be
changed. The Pallet
Name drop-down
allows the user to select a different pallet that was previously created
in step 1. The layout Name may also
be changed here. Click OK to save changes
and move ahead.
Note:
If, in step 4, two (or more) pallets were added in the Number of Pallets
drop-down,
they will appear as line items in the New
Layout dialog
shown above. Be sure to adjust the position of the additional pallet(s)
to avoid having pallets overlap. In any case, it us unlikely that more
than two pallets will be used in a pallet layout.
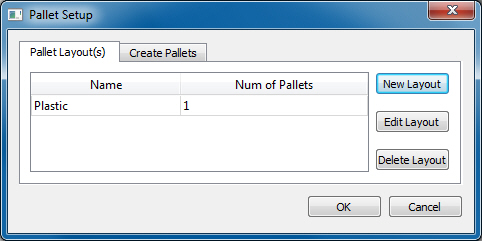
6)
The new
"Plastic" Pallet Layout displays in the Pallet Setup
dialog
and it is ready to be used on the stacking table. The Name and
Number
of Pallets in
the layout display in read-only fields. Click OK
to close
out the dialog and return to the Stacker interface.
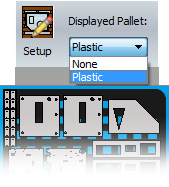
Use the
Pallet Layout in the Part Stacker Work Area
7)
In the
image below, the Plastic pallet layout
has been selected from the drop-down, and appears (in black) under the
parts on the stacking table.