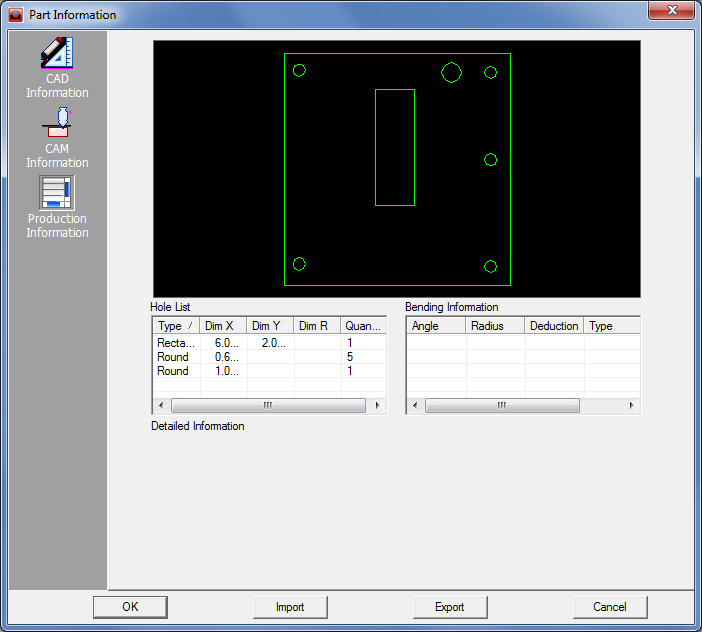
The options in the Production Information panel allow you to determine the hole types and sizes, and their corresponding coordinates. You can also review the bending line information for the part, such as the bend angles, radii, deduction and type (front or back), and whether the bend lines are attached to the welding lines. |
Notes: |
1. If you select a specific hole type in the Hole List, the remaining holes of the same type will turn red. The bending lines will become gray and the remaining hole types remain unchanged in the part preview. |
2. If you select a specific bending line in the Bending Information list, the bending line turns red, the holes become gray and the remaining bending lines remain unchanged in the part preview. |
3. The hole and bending information are listed on the Template Report. |
|
Hole List The Hole List table will display the status of all the internal holes on the part. The information in the chart will be reflected in the Part Template report. |
|
Type |
The hole type, such as Round, Square, Rectangle, Obround, etc. |
|
Dim X |
The X dimension of the hole. |
|
Dim Y |
The Y dimension of the hole. |
|
Dim R |
The radius of the corner. |
|
Quantity |
The total number for the selected hole type. |
Bending Information This table will list the bend line information associated with the part. |
|
Angle |
Allows you to specify the actual flange angle relative to the remainder of the model. The angle is calculated from the moving angle relative to the flat surface of the material. |
|
Radius |
The Radius (Bend Radius) allows you to note the radius of the bend for the purpose of report creation. The value that you type in the field does not affect the bend model. |
|
Deduction |
The Deduction (Bend Deduction) allows you to note the deduction for the purpose of report creation. The value you type in the field does not affect the model. |
|
Type |
The Type field allows you to set the direction of the bend. Double-clicking a field in the Type column toggles between the "Front" and "Back" bend types. |
|
Bend Comments |
The user can add bend comments to be saved with the part info. This is information is passed on to the press brake operation on Amada's ERP system. |
Detailed Information This table will display specific information for holes or bending lines, depending on the selection in the Hole Chart or Bending Info tables. |
|
Hole Information |
When you select a line item
in the Hole List, the system will display detail information for
that hole. |
|
X Coordinate |
The X coordinate of the center point. If the hole does not have a center point, the system will compute the center point from the outer boundary. |
|
Y Coordinate |
The Y coordinate of the center point. If the hole does not have a center point, the system will compute the center point from the outer boundary. |
|
Type |
The hole type, i.e., Round, Obround, Square, Rectangle, etc. |
|
Bending Information |
When
you select a line item in the Bending Info list, the associated
detail information for the bending line will appear. |
|
Bend Length |
The length of the bending line. |
|
Attached to Weld Length |
Pattern will have an associated flag assigned with the length of a line that is used by the WC (Work Center) set with a given time to weld per inch or millimeter according the material and part being used. |
|
WC Set |
References the welding or bending Work Center (WC) that is associated with the bending attribute. |
|
OK / Cancel |
Applies the settings to the current part. If you do not save the part manually, the settings will be lost. Exit without saving the changes. |
|
Import |
Clicking the Import button displays the Open>Parts dialog box. In addition to standard inv files, the user may choose to load from Tool Inventory files in .XLS or .CSV formats. From here it is also possible to create and edit .xls and .csv files. See Export below for more info on this. |
|
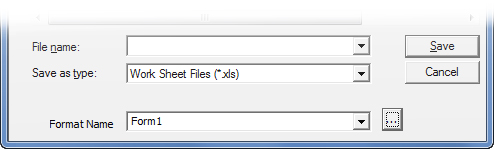
Export |
To export Tool files in .XLS or .CSV formats, click Export. The Save As dialog will open allowing the user to save directly to the TOOLINV folder in the AP100US installed folder in either .xls or .csv format.
The Save As folder contains a Format Name and button. The user may select from existing formats, or click the button to open the Format Options window to create or edit formats. See Exporting Files in XLS or CSV formats in the Material Files folder for more info on creating and editing .xls and .csv files. |