Chapter 7
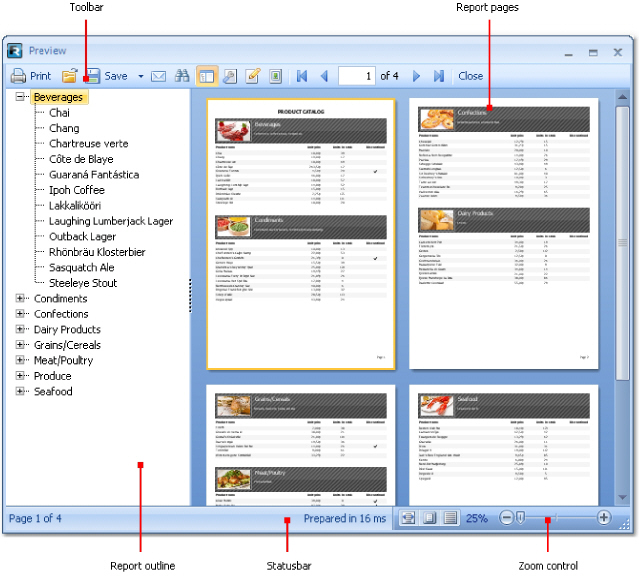
A built report can be shown on the screen, printed on the printer or exported into one of the supported formats. All these can be done in the preview window:
On the toolbar, you can find the following buttons:
![]()
Button |
Description |
|
Print the report. |
|
Open the prepared report file in FPX format. |
|
Save the report in one of the supported formats. |
|
Send the report by email. |
|
Text search in the report. |
|
Shows or hides report outline. |
|
Page settings. |
|
Edit current report page. |
|
Watermark settings. |
|
Navigate to the first page. |
|
Navigate to the previous page. |
1 |
Navigate to the indicated page. Enter the page number and press Enter. |
|
Navigate to the next page. |
|
Navigate to the last page. |
You can use the following keyboard control:
Key |
Description |
Ctrl+P |
Print the report. |
Ctrl+F |
Text search. |
Arrows |
Scroll the preview. |
PageUp, |
Page up/down. |
Home |
Navigate to the first page. |
End |
Navigate to the last page. |
Esc |
Close the preview window. |
For
editing a page of a prepared report, click the ![]() button
in the preview window. During this, the current page will loaded in the
report designer, where you can do whatever you want with it:
button
in the preview window. During this, the current page will loaded in the
report designer, where you can do whatever you want with it:
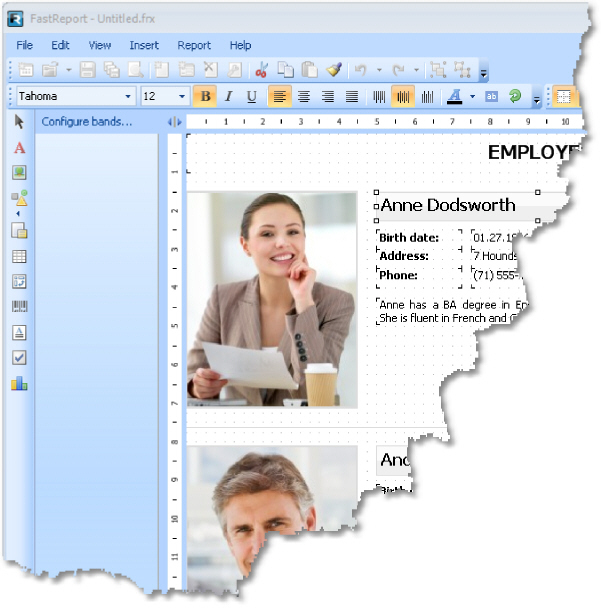
After editing, close the designer. When doing this, you will be asked to save the changes in the report page.
In
order for print a report, press the ![]() button
(or press a combination of Ctrl+P). You will see the print dialogue:
button
(or press a combination of Ctrl+P). You will see the print dialogue:
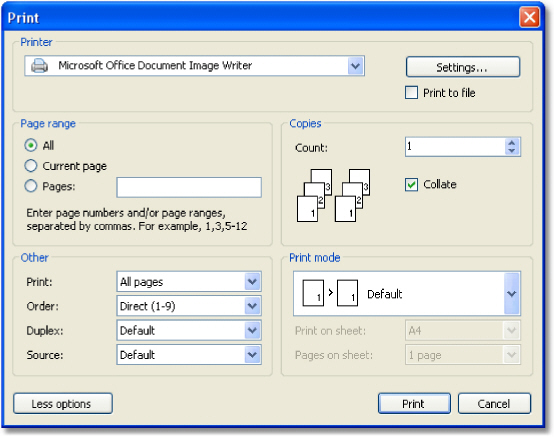
We will look at the settings accessible in this dialogue. The button "More/Less" allows showing the whole dialogue or just the basic settings. By default, a dialogue is shown in a simple form.
"Printer" group: here, you can choose the printer, change its settings ("Settings..." button) and choose print to the file.
"Page" group: here you can choose, which pages to print (all, current or the given page number).
"Copy" group: here you can set the number of copies and choose the order of the pages in the copies ("Collate"):
"Others" group: here you can choose, which pages to print (all, even, odd), choose the order of printing (direct, reverse), set up the duplex printing (if your printer supports it) and choose the paper source.
"Print mode" group allows choosing one of the printing modes:
Mode |
Description |
|
The
printer prints on a paper, indicated in the report. One |
|
Use
this mode, if you need to print A3 report on a Acyrillic4 format |
![]()
Use this mode, if you need to print A4 report having on a Acyrillic3 format paper. On one printing sheet, you can print 1, 2, 4 or 8 report pages. When using this mode, you need to choose the format of the paper on which you want to print, from the "Printing on sheet" list, and also indicate the number of pages in the "Pages on sheet" list.
After pressing the "Print" button, printing of the report will start. If the "Print to file" flag is chosen, then the name of the file will be requested and the report will be saved in that file (file with a PRN extension).
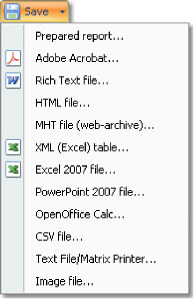
FastReport allows exporting the built report into different formats. At the moment, export to 11 formats is supported: PDF, RTF, HTML, MHT, Excel (XML), Excel 2007, PowerPoint 2007, OpenOffice Calc, CSV, TXT, image file. For choosing export, press the "Save" button in the preview window and choose the export:
FPX format is FastReport's "native" format. The advantages of this format are as follows:
saving the report without losing the quality. Opening an already saved file, you can do all operations with it, like print, export, editing;
compact format based on XML, compressed with the help of ZIP;
when needed, the report file can be unpacked by any archiver that supports the ZIP-format and corrected manually in any text editor.
The only thing lacking with the format is that, to view it, you need to have FastReport.Net.
In order to save in the FPX format, press the "Save" button in the preview window and choose the "Prepared report" file type. For opening already saved files, press the "Open" button.
PDF (Portable Document Format) is a platform-independent format of electronic documents created by Adobe Systems. The free Acrobat Reader package is used for viewing. This format is rather flexible it allows the inclusion of necessary fonts, vector and bitmap images; it allows transferring and storage of documents intended for viewing and further printing.
Export method is a layered one.
When exporting to Excel, there will be a dialogue window for setting parameters of the output file:
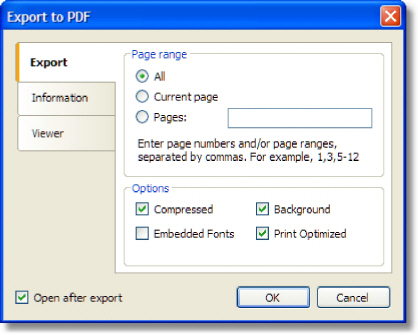
Export parameters:
"Compressed" - output file is compressed. It reduces file size but increases export time;
"Embedded fonts" - all fonts used in a report will be included into PDF file. This will significantly increase the file size;
"Background" - the page watermark will be exported as an image. This will significantly increase the file size;
"Print optimized" - output of all graphics objects (such as pictures, charts) in high resolution for further printing.
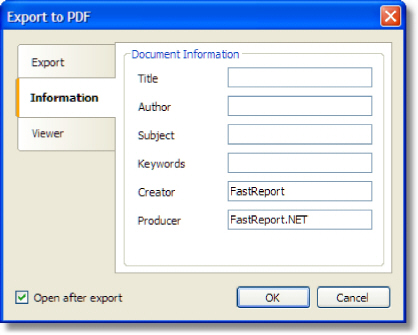
On the "Information" tab, you may fill in the document information fields:
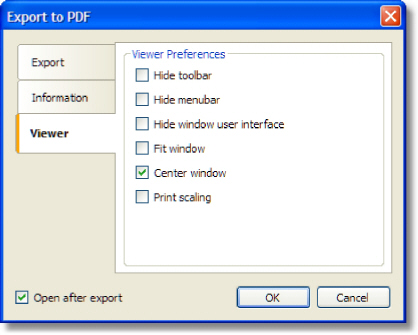
On the "Viewer" tab, you may set up some options related to Adobe Acrobat document viewer:
RTF (Rich Text Format) was developed by Microsoft as a standard format for exchanging text information. At the moment RTF-documents are compatible with many new text editors and operation systems.
Export method: tabular.
When exporting to RTF, there will be a dialogue window for setting parameters of the output
file:
Export parameters:
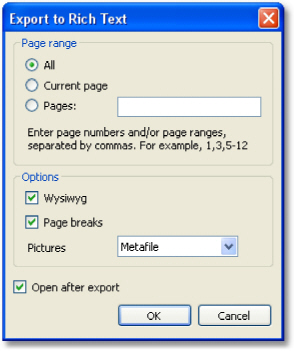
"Wysiwyg"
- the result will be as close to the report as possible. If this option
is disabled, FastReport will reduce the number of rows and columns
in the resulting;
"Page breaks" - enables page breaks in the RTF file; "Pictures"
- select the format of pictures in the RTF file. Note that "Metafile"
format is best for displaying of such report objects as MSChartObject
and ShapeObject.
Appearance and size of the resulting file depends on the report template (see the "Recommendations on report development" section).
HTML (HyperText Markup Language) is the predominant markup language for Web pages. It provides a means of describing the structure of text-based information in a document - by denoting certain text as links, headings, paragraphs, lists, and so on - and to supplement that text with interactive forms, embedded images, and other objects.
Export method: tabular.
When exporting into HTML, a dialogue window will be offered for setting the parameters:
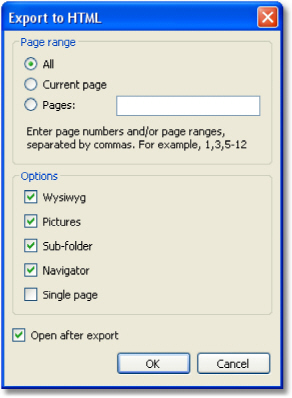
Export parameters:
"Wysiwyg" - the export result will be as close to the report as possible;
"Pictures" - enables to export pictures;
"Sub-folder" - all extra files are saved in a separate folder called ".files";
"Navigator" - creates a special navigator for navigating on pages;
"Single page" - all pages will be saved in one file.
Appearance and size of the resulting file depends on the report template (see the "Recommendations on report development" section).
MHT, short for MIME HTML, is a web page archive format used to bind resources which are typically represented by external links (such as images, Flash animations, Java applets, audio files) together with HTML code into a single file. The content of an MHT file is encoded as if it were an HTML e-mail message, using the MIME type multipart/related.
Export method: tabular.
When exporting into MHT, a dialogue window will be offered for setting the parameters:
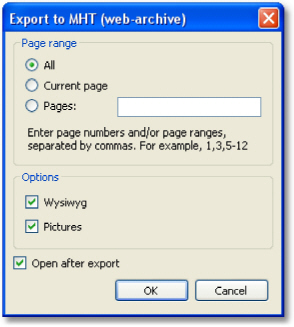
Export parameters:
"Wysiwyg" - the export result will be as close to the report as possible; "Pictures" - enables to export pictures.
Appearance and size of the resulting file depends on the report template (see the "Recommendations on report development" section).
Excel is an application for working with electronic worksheets. It is included into Microsoft Office.
Export method: tabular.
When exporting to Excel, there will be a dialogue window for setting parameters of the output file:
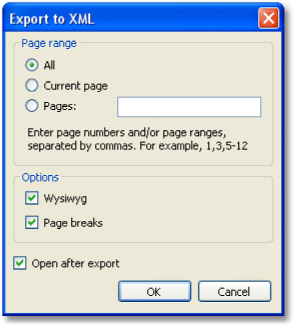
Export parameters:
"Wysiwyg" - the result will be as close to the report as possible. If this option is disabled, FastReport will reduce the number of rows and columns in the resulting file;
"Page breaks" - enables page breaks in the resulting file.
Appearance and size of the resulting file depends on the report template (see the "Recommendations on report development" section).
Excel 2007 is an application for working with electronic worksheets. It is included into Microsoft Office 2007.
Export method: tabular.
When exporting to Excel, there will be a dialogue window for setting parameters of the output file:
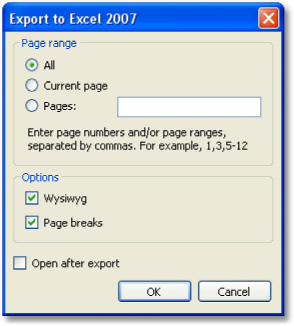
Export parameters:
"Wysiwyg" - the result will be as close to the report as possible. If this option is disabled, FastReport will reduce the number of rows and columns in the resulting file;
"Page breaks" - enables page breaks in the resulting file.
Appearance and size of the resulting file depends on the report template (see the "Recommendations on report development" section).
PowerPoint 2007 is an application for working with electronic presentations. It is included into Microsoft Office 2007.
Export method is a layered one.
When exporting to PowerPoint, there will be a dialogue window for setting parameters of the output file:
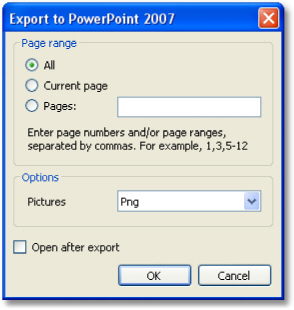
Export parameters:
"Pictures" - select the format of pictures in the resulting file.
OpenDocument Format (ODF, OASIS Open Document Format for Office Application) was designed by OASIS and based on XML format used in OpenOffice.
FastReport supports export to table (.ods file). These files can be opened in OpenOffice.
Export method: tabular.
When exporting to OpenOffice Calc, there will be a dialogue window for setting parameters of the output file:
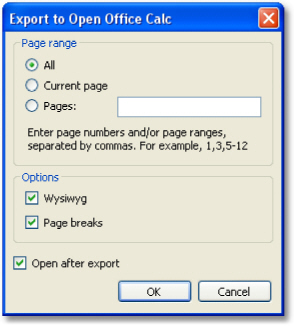
Export parameters:
"Wysiwyg" - the result will be as close to the report as possible. If this option is disabled, FastReport will reduce the number of rows and columns in the resulting file;
"Page breaks" - enables page breaks in the resulting file.
Appearance and size of the resulting file depends on the report template (see the "Recommendations on report development" section).
The CSV file is used for the digital storage of data structured in a table of lists form. Each line in the CSV file corresponds to a row in the table. Within a line, fields are separated by commas, each field belonging to one table column. CSV files are often used for moving tabular data between two different computer programs, for example between a database program and a spreadsheet program.
Export method: tabular.
When exporting to CSV, there will be a dialogue window for setting parameters of the output file:
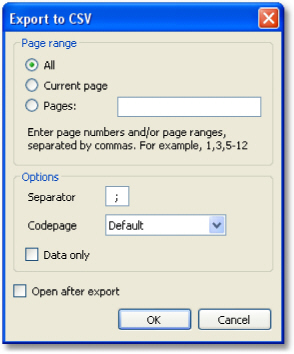
Export parameters:
"Separator" - the field separator character;
"Codepage" - codepage used to encode the text in resulting file. The "Default" codepage refers to Windows default codepage. Note that Excel does not support unicode codepages;
"Data only" - enable this checkbox to export objects laying on Data band only.
TXT is a regular text file that can be opened in any text editor, or printed to a dot-matrix printer.
Export method: tabular.
When exporting to TXT, there will be a dialogue window for setting parameters of the output file:
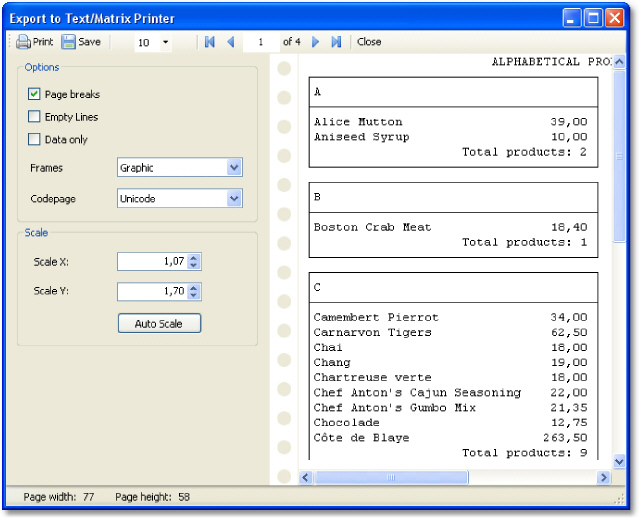
Export parameters:
"Page breaks" - enables page breaks in the resulting file;
"Empty Lines" - enables empty lines in the resulting file;
"Data only" - enable this checkbox to export objects laying on Data band only;
"Frames" - type of object's borders. Select "None" if you don't want to export borders;
"Codepage" - codepage used to encode the text in resulting file;
"Scale X" - horizontal scale;
"Scale Y"- vertical scale;
"Auto Scale" - calculates scale X and scale Y automatically to avoid data loss.
FastReport allows exporting information into the following graphical formats:
BMP
PNG
JPG
GIF
TIFF
Windows Metafile (EMF,WMF)
Exporting method: drawing.
When exporting into picture files, a dialogue window will be offered for setting the parameters:
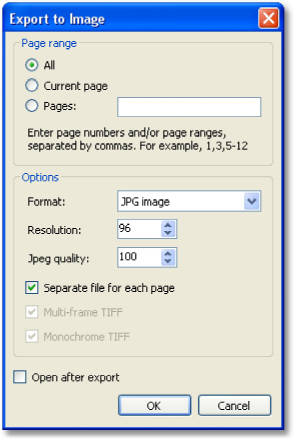
Export parameters:
"Resolution" - resolution of the graphical image. Use 96dpi for displaying, 300dpi for printing. When exporting into the TIFF format, you will able to set separate values for horizontal and vertical resolution;
"Jpeg quality" - JPG file compression level. This option is used only when exporting into the Jpeg format;
"Separate file for each page" - if the option is enabled, then each report page will be exported into a separate file, the name of the file will be formed on the basis of the chosen page with the given number;
"Multi-frame TIFF" - this option produces the multi-frame TIFF file. It is used only when exporting into the TIFF format;
"Monochrome TIFF" - this option produces the monochrome TIFF file. It is used only when exporting into the TIFF format.
When exporting several pages into one file (when the "Separate file for each page" option is disabled), the export will use a lot of CPU/Memory resources.
A prepared report can be saved to an FTP server from the FastReport.NET preview. The report can be exported to one of the supported formats before being saved to FTP.
Press "Save" button and select "FTP...". This opens the "Save to FTP" window:
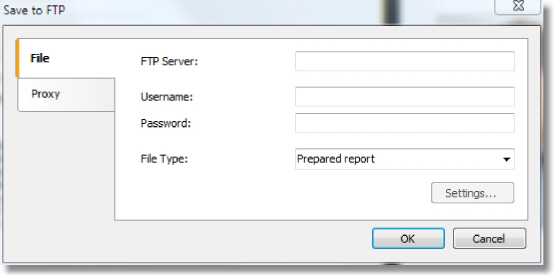
The File tab has the following fields:
- FTP Server: enter the URL-address of the FTP server
- Username and Password: enter your username and password
- File Type: select the file format (prepared report or one of the export formats) from the drop-down list.
If an export format is selected then the •Settings...” button becomes available, which opens the settings window for the chosen export format. If a proxy server is used then the URL-address, port, username and password of the proxy server are set on the Proxy tab:
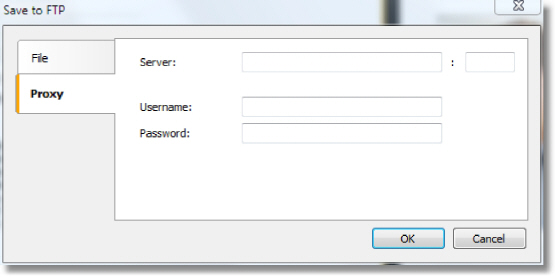
When all settings have been made click the OK button to save the file to the FTP server.
A prepared report can be saved to a Dropbox from the FastReport.NET preview. The report can be exported to one of the supported formats before being saved to the Dropbox.
Before
saving a report to a Dropbox an application must be created in your Dropbox
account. Do this by logging in to your Dropbox account and taking
the following steps:
- click the •More” button: it is located at the bottom of the Dropbox homepage
- choose •Developers” in the drop-down list: you will be directed to the
page for developers- go to •App Console”: it directs you to the list of
applications
- click the •Create App” button: the Dropbox will check your email: click
Send Email. In your mail system inbox you will find an email having
a •Confirm” button: click the button to confirm your email address.
Finally you will be directed to •Create a new Dropbox Platform app”.
Select "Dropbox API app" and answer the question "What type of data does your app need to store on Dropbox?" by selecting "Files and datastores".
Answer the question "Can your app be limited to its own, private folder?" by choosing either of the two proposed answers.
This page also requires you to enter the name of the application.
After clicking the •Create app” button the system will create the application.
As a result the application settings page is opened. Here you can see the •App key” and the
App secret”, which are required when exporting to a Dropbox.
You can now go to the FastReport.NET preview and export the file to the Dropbox by pressing the "Save" button and selecting •Dropbox...”. When exporting to a Dropbox for the first time the "Application Info" window will be displayed:
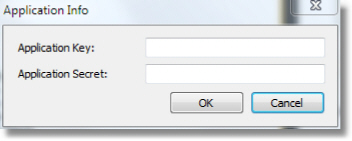
Enter the •Application Key” (App key) and •Application Secret” (App secret) obtained above. After clicking the •OK” button FastReport.NET saves these values and uses them again the next time.
The •Save to Dropbox” window has two tabs: File and Proxy:

The File tab contains the following fields:
- FTP Server : enter the URL-address of the FTP server- Username and Password : enter your username and password- File Type : select the file format (prepared report or one of the export formats) from the drop-down list.
If an export format is selected then the •Settings...” button becomes available, which opens the settings window for the chosen export format.
If a proxy server is used then the URL-address, port, username and password of the proxy server are set on the Proxy tab:

When all settings have been made click the •OK” button to save the file to the Dropbox.
A prepared report can be saved to Google Drive from the FastReport.NET preview. The report can be exported to one of the supported formats before being saved to Google Drive.
Before saving a report to Google Drive an application must be created in your Google Drive account.
Do this by going to https://code.google.com/apis/console/- this page has the license agreement and leads to the Project Settings page.
Go to the •Services” tab and activate the •Drive API”.
Go to the •API Access” tab and click "Create an OAuth 2.0 client ID".
In the •Branding Information” section enter the name of the application and click •Next”. In •Client ID Settings”, select the following:
- •Installed application” for Application type
- •Other” for Installed application type.
Click •Create Client ID”.
As a result the next page shows the •Client ID” and •Client secret”.
You can now go to the FastReport .NET preview and export the file to Google Drive by pressing the "Save" button and selecting •GoogleDrive...”.
When exporting to a Dropbox for the first time the "Client Information" window will be displayed:
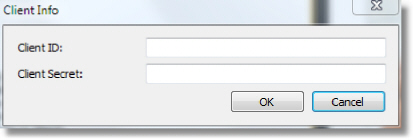
Enter the •Client ID” and •Client Secret” obtained above. After clicking the •OK” button FastReport.NET saves these values and uses them again the next time.
The •Save to Google Drive” window has two tabs : File and Proxy:

The File tab contains the following fields:
- FTP Server : enter the URL-address of the FTP server- Username and Password : enter your username and password- File Type : select the file format (prepared report or one of the export formats) from the drop-down list.
If an export format is selected then the •Settings...” button becomes available, which opens the settings window for the chosen export format.
If a proxy server is used then the URL-address, port, username and password of the proxy server are set on the Proxy tab:
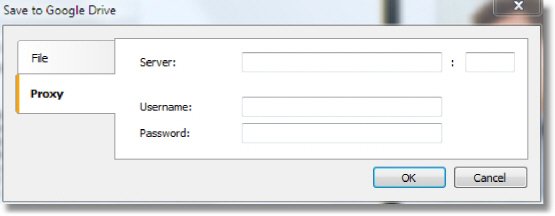
When all settings have been made click the •OK” button to save the file to Google Drive.
A prepared report can be saved to SkyDrive from the FastReport.NET preview. The report can be exported to one of the supported formats before being saved to SkyDrive.
Before saving a report to SkyDrive an application must be created in your SkyDrive account. Do this by going to the SkyDrive home page and clicking "Developers".
In the Development Center click "My Apps" and then click "Create Application".
Enter the name of the application and select a language. Read the "Terms of Use" and "Privacy Statement" and click "I accept".
As a result the next page is the Settings page of the application which shows the "Client ID" and "Client Secret".
Enter the redirection domain and click "Save".
You can now go to the FastReport.NET preview and export the file to SkyDrive by pressing the "Save" button and selecting •SkyDrive...”.
When exporting to SkyDrive for the first time the "Client Information" window will be displayed:
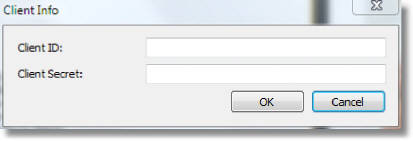
Enter the •Client ID” and •Client Secret” obtained above. After clicking the •OK” button FastReport.NET saves these values and uses them again the next time.
The "Save to SkyDrive" window has two tabs : File and Proxy:
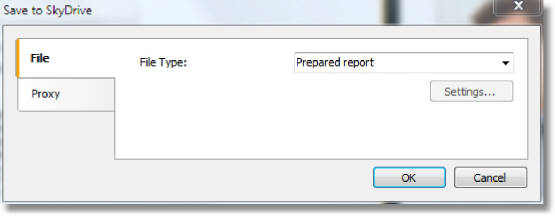
The File tab contains the following fields:
- FTP Server : enter the URL-address of the FTP server- Username and Password : enter your username and password- File Type : select the file format (prepared report or one of the export formats) from the drop-down list.
If an export format is selected then the •Settings...” button becomes available, which opens the settings window for the chosen export format.
If a proxy server is used then the URL-address, port, username and password of the proxy server are set on the Proxy tab:
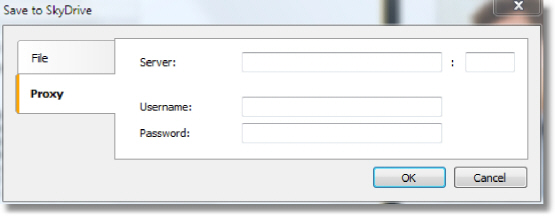
When all settings have been made click the •OK” button to save the file to SkyDrive.
In this chapter, special design requirements of reports intended for export to other data formats will be discussed.
FastReport allows a great number of ways to manipulate objects during report creation. This gives the advantage of fast development of any reports and their further printing. Printed document will look just as on display. And this is the primary intent of FastReport report generator usage.
The downside of such development freedom is the complexity of exporting the FastReport document to different data formats, which have their own limits and requirements for information presentation, and are sometimes rather complex. Many formats, such as HTML, XLS or RTF, use table data presentation. These formats do not allow cell crossing or arranging in layers when table marking.
Export filters, as a rule, take into account these requirements. This is carried out by special algorithm which takes object crossings into account and places them optimally. At object crossing, there are new columns and rows in the resulting output table appear. That is necessary for getting maximum resemblance between the result and original report. A large number of crossed objects in report design, leads to an increased number of columns and rows in the resulting table, that affects the file size and its complexity.
The quality of the export depends greatly on competent design of initial report. Let us look at the following example:
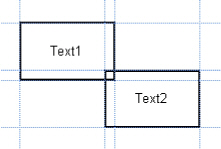
There is a slight crossing of two objects placed one under another on the same band. The number of records on report forming was 150. On export to RTF format 450 rows will be created (150 rows for each object and 150 ones for crossing). If we remove crossing, there will be only 300 rows in the resulting table. In large reports and on huge number of objects the difference will be really tremendous. That, of course, will affect output file size.
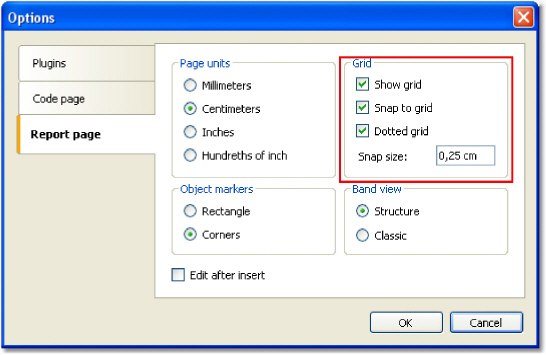
When creating tables in report, pay attention to neighboring cell's borders. It is important that cells do not cross and arrange in layers. Export filter algorithm will cut off cells but export result may be far from desirable (you will see not exactly what you wanted to). Arrange objects in such a way that they are placed in line vertically as well as horizontally. Guidelines can help to perform this.
The grid alignment can also be helpful in case of cells overlapping. Enable grid alignment in designer options. In order to simplify alignment you can extend grid pitch. Setting of grid pitch and alignment can be found in the "View|Options..." menu:
For text framing it is better to use text object's border instead of single graphic objects such as lines, rectangles, etc. Try not to use background objects under transparent text objects.
Applying these simple rules will help you to create a report which will look perfect after being exported to any table-based format.
FastReport allows you to send a prepared report by email. It may work in two modes:
Mode |
Description |
SMTP |
This is default mode. To send an email, you don't need any external programs. |
MAPI |
You may turn on this mode programmatically. To do this, set Config EmailSettings.UseMAPI = true, or, if you use EnvironmentSettings component, set its EnvironmentSettings.EmailSettings.UseMAPI property to true. To
send an email, FastReport uses the default email client such as
Outlook |
To send an email, you need to specify a recipient's email address. Also you need to specify the subject and email body, but this is not required. At the bottom of the dialog, select the format of your report - it will be attached to the message:
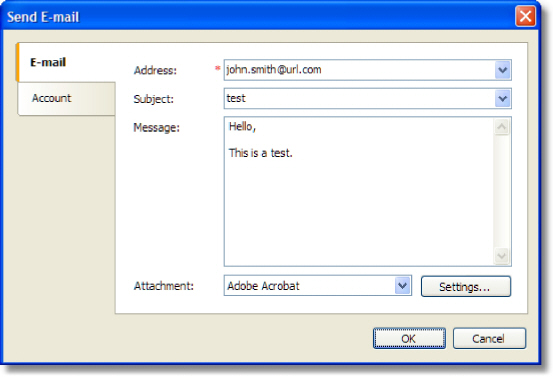
If you use the SMTP mode, you need to set up an account. It is necessary to do only once. Once you have done it, FastReport will save the parameters in the configuration file. The parameters can be found on the "Account" tab. All obligatory fields are marked by red asterisk:
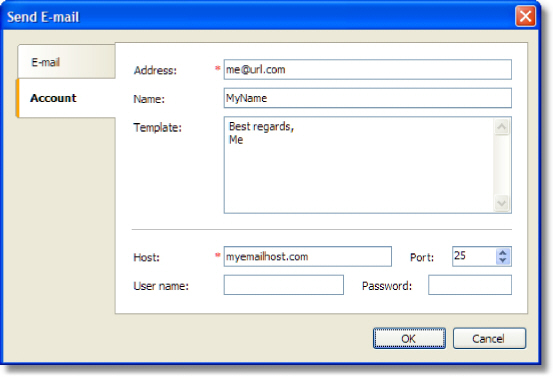
If your host server requires an authentication, you need to fill in "User name" and "Password" fields as well.