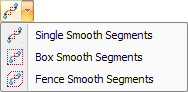
The options on the Smooth Segments submenu allow you to select a single polygon segment, or multiple polygon segments, and “smooth” or reduce the number of patterns to create arc patterns. You can use the smoothing process to generate efficient NC code. (See Single Select Patterns, Box Select Patterns, Fence Select Patterns and Smooth Patterns Window.) |
Notes: |
1. You can use the options on the Smooth Segments submenu either PART View or SHEET View. |
2. The options on the Smooth Segments submenu are available for cutting, punching and combination systems. |
3. The more segments of the path you include, the greater the smoothing. |
4. The Spline Pattern Processing enhancement allows imported dxf/dwg files containing complicated splines to be stably converted into prt files in AP100US. In addition to conversion, this feature may reduce processing time. This feature may best be applied to splines that were converted into lines. |
The Smooth Patterns window appears after you have selected all the segments that you want to smooth. The preview pane on the right displays the selected segments and the result of the smoothing parameters after you click the Preview button. |
|
|
|
Option |
Description |
Number of Patterns before Smooth |
This field displays the original number of patterns before the smoothing process. |
Number of Patterns after Smooth |
This field displays the resulting number of patterns after the smoothing process. |
Line Angle Limit (Degree) |
This option allows you to specify a smoothing angle. If the angle between two lines is greater than the specified value, the system shall smooth the two line segments as an arc. If the angle is less than the value, the smoothing process will ignore the lines and continue with the next angle. You can click and drag the slider bar or type a value in the text box. |
Arc Angle Limit (Degree) |
This option allows you to specify a constraint value for the smoothing. If the moving angle of the arc is less than this value, the arc is smoothed with the lines. If the moving angle is greater than this value, the smoothing process will ignore the arc and continue with the next pattern. You can click and drag the slider bar or type a value in the text box. |
Preview |
Click the Preview button to view the result of the smoothing process. |
OK |
Click OK to apply the result of the smoothing process and to convert the segments into arcs. |
Cancel |
Click Cancel to exit without making any changes. |
The Single Select Patterns option on the Smooth Segments submenu allows you to select the first pattern and the last pattern of a path to smooth the path. The option remains active until you select another option. |
Example: Single Select Patterns |
You have a path made up of several line segments and you want to smooth the path. Select Edit to Smooth Segments to Single Select Patterns and move into the work area. |
Move the pointer near the first pattern until it highlights, and then click. The first pattern is selected. The system prompts you to select the last pattern. Move the pointer near the last pattern until it highlights, and then click. The Smooth Patterns window appears with the path you selected in it. Set the parameters in the window, and the path will change to reflect the settings. Click OK. The path is smoothed. (See Smooth Patterns Window.) |
The Box Select Patterns option on the Smooth Segments submenu allows you to draw a rectangular box, or marquee, around several patterns on a path to smooth the path. You must specify a starting corner and ending corner for the box. You can specify the starting corner at any point and then drag the marquee diagonally in the desired direction to enclose the pattern(s). Any pattern(s) that you enclosed within the marquee are selected when you select the ending corner for the box. |
Example: Box Select Patterns |
You have a path consisting of several line segments and you want to smooth the path. Select Edit to Smooth Segments to Box Select Patterns and move into the work area. The system prompts you to select the starting corner. Move the crosshair to a point that is above and to the left of the line segments and click the left mouse button. An Origin marker appears to indicate the position of the starting corner. |
The system prompts you to select the ending corner. Move the crosshair down and to the right to enclose the line segments. When all the desired line segments are enclosed within the marquee, click the left mouse button. The Smooth Patterns window appears with the path you selected in it. Set the parameters in the window, and the path will change to reflect your settings. Click OK. The path is smoothed. (See Smooth Patterns Window.) |
The Fence Select Patterns option functions like Box Select Patterns, but you draw a series of lines to enclose the patterns. You must specify the starting point and ending point of each line, and then select the snap point at the beginning of the first line to complete the fence. Any pattern(s) within the area are selected when you complete the fence. |
Example: Fence Select Patterns |
You have a path consisting of several line segments and you want to smooth the path. Select Edit to Smooth Segments to Fence Select Patterns and move into the work area. The system prompts you for the starting point. Select a starting point for the first line. The system prompts you for the ending point. Move the crosshair in any direction to draw the line. Click the left mouse button to select the end point. Draw the second and third lines of the fence. |
Select the starting point for the last line, and then move the crosshair near the starting point of the first line. Right-click to snap the start point of the first line and make it the ending point of the last line. Click the left mouse button to complete the fence. The Smooth Patterns window appears with the path you selected in it. Set the parameters in the window, and the path will change to reflect your settings. Click OK. The path is smoothed. (See Smooth Patterns Window.) |
