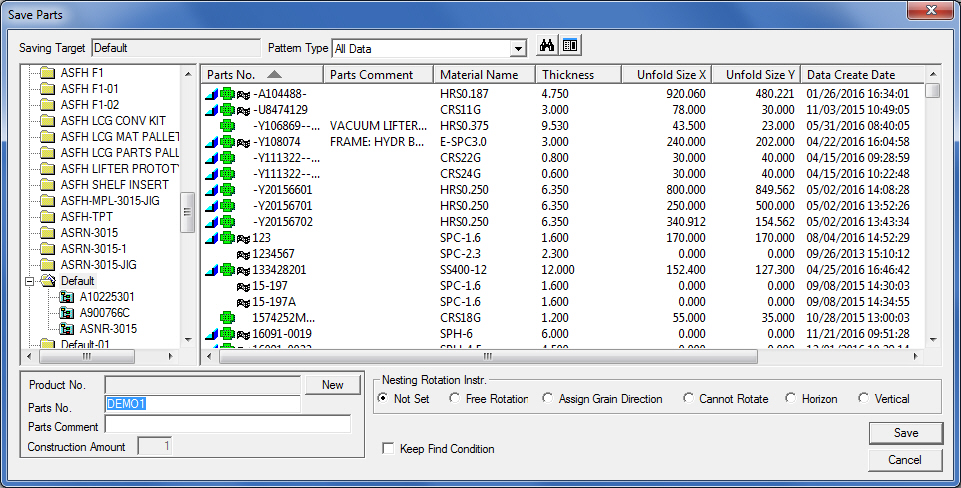
Select SDD Save Parts to save an AP100US part into the SDD Server. The saved part can be used by AP100Global, Dr.ABE_Bend and Dr.ABE_Blank.
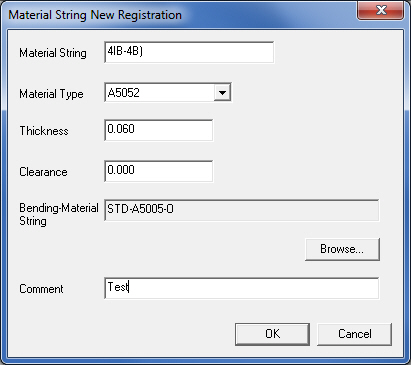
Note: The program may require a new Material String to be registered.
Option |
Description |
|
Saving Target |
The selected target folder that you will save to. |
|
Pattern Type |
Select which data patterns will display (All Data, Diagram/NC Data, Allow Diagram Data and No NC Data). |
|
|
Selecting Search will display the Find Data window, which allows search parameters to be set. |
|
|
Toggling the Switch option will enable/disable the thumbnail preview. |
|
Left Pane (Target Folder Tree) |
The left pane displays the current directory in a Windows Explorer-type structure. |
|
Right Pane (Parts list) |
The right pane displays information about the part, such as Parts No., Parts Comment, Material Name, Thickness, Unfold Size X, Unfold Size Y, Data Create Date and Data Refresh. Click the column header to sort in ascending or descending order. The |
|
Thumbnail View |
A thumbnail image of the selected part displays here. Choose a 3D or Unfolded diagram. |
|
Product No. |
Displays the product number that was assigned to the product when it was created. *Products are Kits that contain multiple parts. |
|
New |
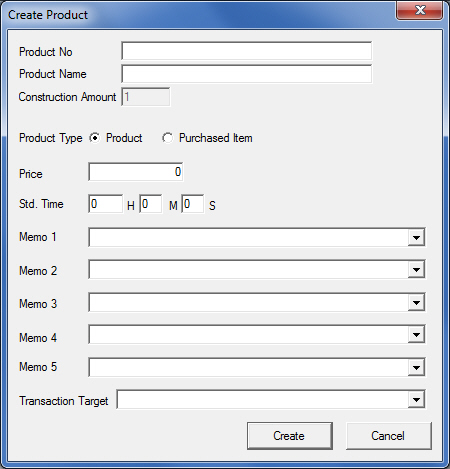
To create an entirely new product with unique information (such as “Product Name”) click New, which opens the Create Product dialog box: |
|
|
|
|
|
Product No |
Enter a unique number for the product. Use up to 32 single-space alphanumeric characters. “-“ can also be used. This number will display in the Product No. field in the SDD Save Part and SDD NC File options. |
|
Product Name |
Enter a unique name for the product, which will display in the target folder tree. (This is the equivalent of up to 40 single-space characters. Kana and Kanji characters can be used.) |
|
Construction Amount |
Enter the amount of items that you will construct. |
|
Product Type |
Select the product type from Product or Purchased Item. |
|
Price |
When the product type is Purchased item, enter the unit price. |
|
Memo |
Fields for up to 5 different memos for the product. |
|
Transaction Target |
Enter the target of the transaction. |
|
Create |
Click Create to save all data and create the new product. |
|
Cancel |
Click here to close the dialog. |
|
Now that you have created a product, you must add parts to it in the SDD Save Part window. |
|
Parts No. |
The part number or file name that the part was saved with. |
|
Parts Comment |
The comment that was saved with the part. |
|
Construction Amount |
The amount of parts to be made (the default setting is 1). (This option is enabled when the part is included in a product.) |
|
Nesting Rotation Instructions |
Select one of the Rotation Instructions below: |
|
Not Set |
No rotation value has been set. The part will take on the default rotation setting of the program it's opened with. (Typically the default rotation value is Free Rotation.) |
|
Free Rotation |
The part is free to rotate at any angle. |
|
Assign Grain Direction |
Sets the part rotation to be the same as the grain direction of the material. |
|
Cannot Rotate |
The part will be nested using its default rotation. |
|
Horizon |
Allows horizontal nesting only. |
|
Vertical |
Allows vertical nesting only. |
|
Keep Find Condition |
Retains the search criteria that were entered in the Parts No. field. Now select any folder in the Left Pane (Target Folder Tree) and it will be searched according to these criteria. |
|
Save |
Saves the selected file. |
|
Cancel |
Closes the window. |
|
To register a new Material String select Material Type from the pull-down, enter Thickness and Clearance values, Browse for another Bending Material String if needed, enter any Comments and click OK.