![]()
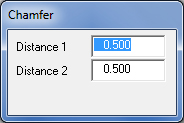
You can place a chamfer on any corner or intersection using the Chamfer Line option. When you select the option, the Chamfer dialog appears. You can specify the distance you want removed from each individual line by typing values in the Distance 1 and Distance 2 text boxes. |
||||
|
||||
Distance 1 determines where the chamfer begins on the first line; Distance 2 is where the chamfer begins on the second line. |
||||
The system prompts you to select the first and second sides of the chamfer. The two lines need not be intersecting, but must be capable of forming an intersection if extended. The specified distance shortens each line and a line appears between them. |
||||
Example: Creating a Chamfer Line |
||||
Create a new 10 x 10 part. Draw Rectangle Lines around the part. Select Edit > Chamfer Line. Move the pointer into the Chamfer dialog. The current value in the Distance 1 text box becomes selected. Type .25 <Tab> .25 <Enter>. |
||||
Move into the work area and click the upper horizontal line at the top of the part, and then click the vertical line at the right side of the part. The chamfer appears on the part. For more practice, try modifying the distances and place chamfers on the remaining corners. |
||||
|