![]()
The Blend Patterns command allows you to place an arc between any two lines, arcs or rounds, or any combination of any of these two pattern types. |
||||||||
If you blend two lines, the patterns are trimmed to the arc. If you blend two arcs, or a round and an arc, the system inserts the new arc between the two patterns. To blend patterns, select Edit > Blend Patterns. Select the first pattern where you want to begin the blend and then the second pattern where you want to end the blend. An arc appears between the patterns. As you move the mouse, the arc bounces between the snap points of the patterns. Move the mouse until the arc appears near the correct position. When prompted to specify the radius, type the value and press <R>. |
||||||||
|
||||||||
Notes: |
||||||||
1. Make sure you specify the correct radius. If you specify the wrong radius, it is easier to delete the arc and blend the lines again, rather than attempt to edit the arc. |
||||||||
2. If you select the wrong patterns, move the mouse out of the work area to cancel the blend operation. You can select the correct patterns and attempt the blend again. |
||||||||
3. Typing the radius is the most accurate method for placing a blending arc between patterns. |
Example 1: Blending Two Rounds |
||||||||||||||
Create a new 10 x 10 part. Draw a 0.25 radius round at 5X 5Y. Draw a 1.0 radius round at 7X 8Y. Select Edit > Blend Patterns. The system prompts you to select the first pattern for the blend. Click the 0.25 radius round. The system prompts you select the second pattern for the blend. Click the 1.0 radius round. Move the mouse and observe the blending arc that appears between the two rounds. The blending arc toggles between the possible starting and ending points of the rounds. You can determine how many different blends are possible by moving the mouse. |
||||||||||||||
|
||||||||||||||
Example 2: Blending a Radius |
||||||||||||||
A common use for blending is to add a radius to a corner. Use the 10 x 10 part you created in the previous example. Select Draw > Rectangle Lines and draw the lines around the part border. |
||||||||||||||
Select Edit > Blend Patterns. Select the vertical line on the left side of the part. The line travels from 0,0 to 0,10. For the second pattern, select the line at the top of the part. It travels from 0,10 to 10,10. When you are prompted for the radius, move the pointer inside the part near the upper left corner. Observe how the blending arc moves with the pointer. Make sure the blending arc curves in the correct direction. |
||||||||||||||
If the arc is near the correct position, you can specify the radius. Type .25R.The 0.25-radius arc appears and the two rectangle lines are trimmed to the end points. |
||||||||||||||
|
||||||||||||||
Notes: |
||||||||||||||
1. If one or more lines disappear, the blending arc was not in the correct position when you specified the radius. You must position the arc at the correct angle before you can define the radius. |
||||||||||||||
2. If you plan to add blended arcs to the remaining corners, then you need only specify the radius value once. Once you specify the radius value, you can select the two lines, position the arcs in the correct orientation, and then place the remaining arcs. |
||||||||||||||
Example 3: Blending Two Arcs |
||||||||||||||
Create a new 10 x 10 part. Draw the first arc with a center point at 2X 1Y and specify a 0.25 radius, a -90° starting angle and a -180° moving angle. Draw the second arc at with a center point at 4X 1Y and specify a 0.5 radius, a 90° starting angle and a -180° moving angle. |
||||||||||||||
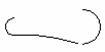
Select Edit > Blend Patterns. Select the 0.25 radius arc and then the 0.5 radius arc. As you move the pointer, observe the blending arc bounce between the two original arcs. Type 5R to specify a radius of 5.0. |
||||||||||||||
Zoom In on the two patterns. You will notice that the original patterns do not exactly join the new arc. Select Edit Patterns from the Edit menu. Modify the starting angles (Angle 1) of the 0.25 radius arc and snap it onto the new arc. |
||||||||||||||
Edit the Move Angle of the 0.5 radius arc and snap it onto the new arc. Use the New Angle button next to the Angle 1 and Angle 2 fields in the Arc property window. Repeat the procedure to blend the left sides of the original arcs. Edit the original patterns as necessary so they intersect the end points of the blending arc. |
||||||||||||||
|